
Today's BDR guest poster is Rebecca from Searching Out Simple.
Rebecca always makes adorable clothes for her son and little girls, so I knew she would come up with something awesome to share. ______________________
Rebecca always makes adorable clothes for her son and little girls, so I knew she would come up with something awesome to share. ______________________

Hi! I'm Rebecca from Searching Out Simple. I have three kids, two dogs, an Army husband and a to-do list that will keep me busy for years if I ever get it all done. I love creating things for my home and family as well as gift giving. If I'm sewing or Mod-Podging things together you know there is a pile of laundry on the bed and stack of dishes in the sink. But a girl's gotta have priorities right? Right. ;)
I was so excited about Jen's BDR series and flattered that she asked me to guest post. My dress is somewhat inspired by a drop waist dress I saw at the store and thought "hey, I could make that for less than $5". I love a challenge. I hope my tutorial inspires even the beginning seamstress, that with enough determination {and maybe a few choice words} you can see a vision come to life and learn some lessons along the way.
*Disclaimer* I am still fairly new at making clothing. I have a lot to learn about clothing construction and this did not turn out to be a drop waist dress.
Supplies
* button down shirt {I used a short sleeve my husband didn't want}
* coordinating thread
* white or coordinating color cotton {1/4 should be enough}
* extra buttons {optional}
Step 1

First I put my trusty seam ripper to work and removed the sleeves, collar and pocket from the shirt. Set those pieces aside, you'll use some later. Fold what's left of the shirt in half and place a dress that fits on top, also folded in half. Trace around the dress leaving room for seam allowance. I believe most people use 5/8" seam allowance.
Step 2
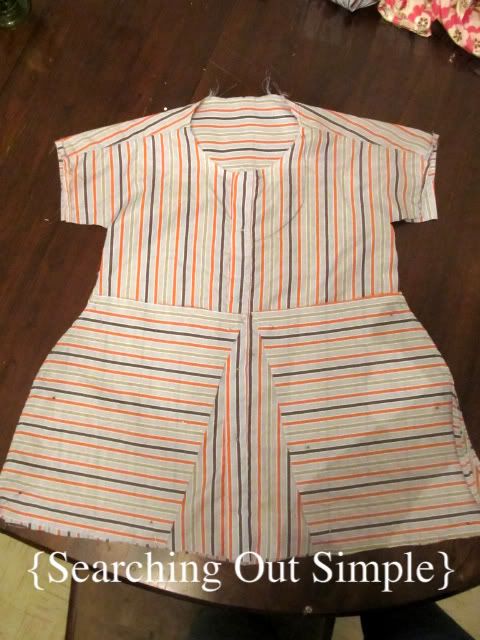
Put right sides of dress together {I didn't cut the top of the sleeve so I just folded the dress in half at the shoulder with right sides facing). Fold the bottom of dress 1/4" two times to create new hem, press, pin and sew. {Ignore the horizontal stripe pieces shown here, this was an idea that didn't work out}. Do the same thing on the sleeves to hem. Then sew from the edge of sleeve to the bottom of dress on both sides.
Step 3
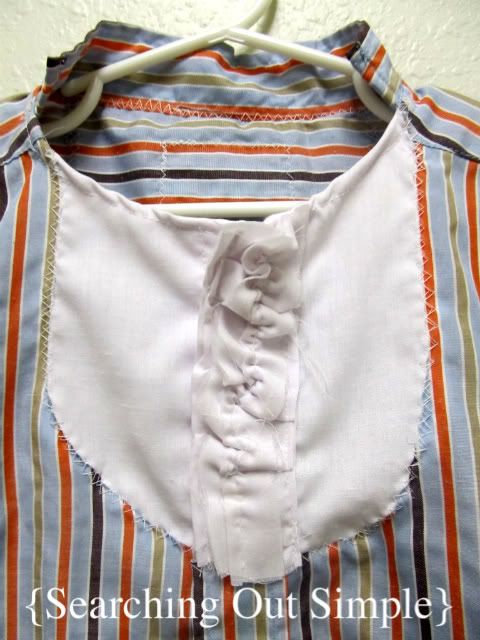
To create the bib I referred to this tutorial. Instead of one piece of white cotton I had two pieces so it could still button up to put on and take off. My pieces were 8"x12" with two inches for the button up center. I accidentally sewed my button hole to the inside piece instead of the outer piece so this dress buttons backwards on the top and I sewed a white ruffle to the top. As you can see, I wasn't very careful while cutting the bib shape, I thought I could cut it folded in half but it didn't come out evenly. Definitely trace a round object and cut along your line. I attached the bib to the button down like sewing an applique, next time I'd like to try a cleaner method.
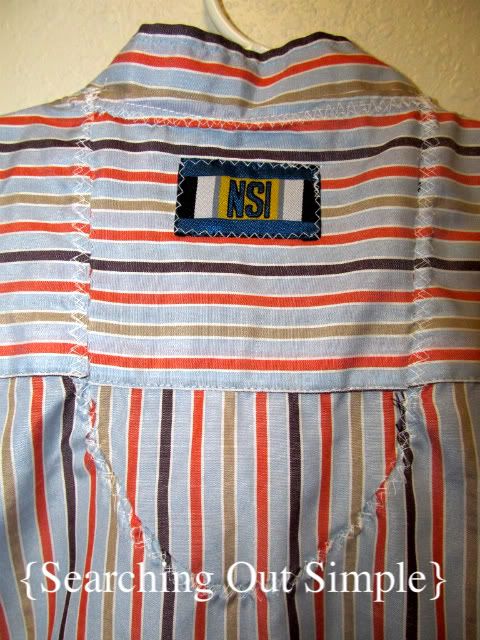
The second picture shows a lesson learned. If you're sewing past your bedtime, triple check what you're doing before cutting fabric. I accidentally cut the back of the shirt while cutting the front for the bib. I pieced it back together and later sewed the tag that was on the inside to the outside, I thought it was something unexpected.
Step 4
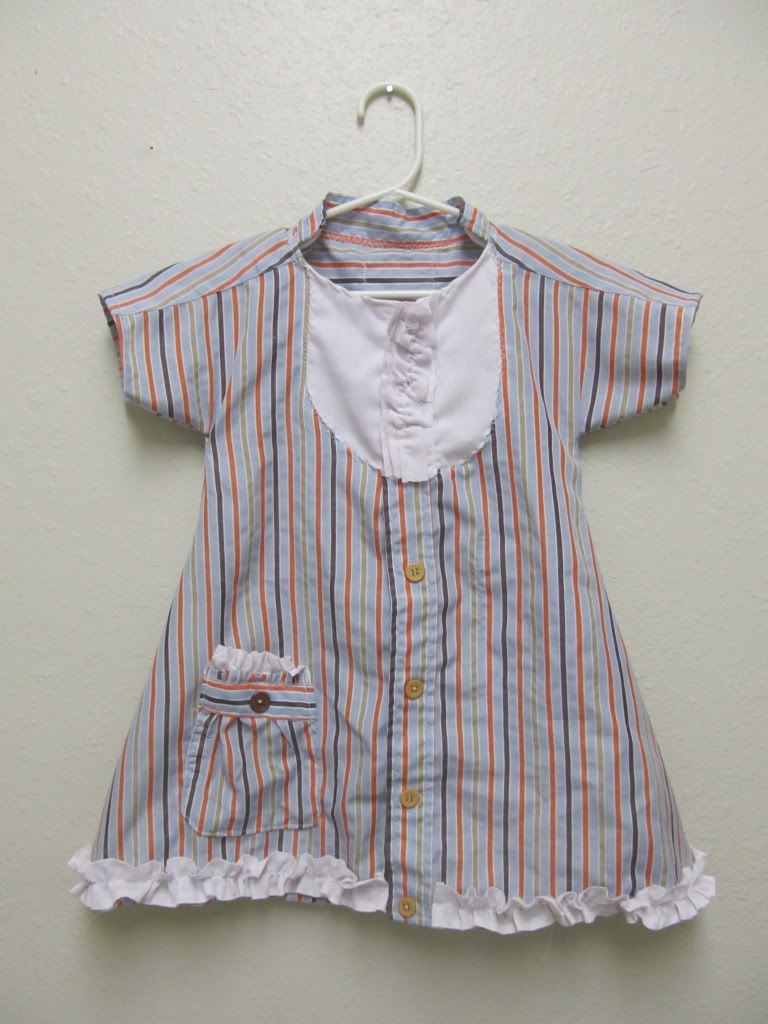
Next came the ruffle at the bottom. I used two pieces of white cotton measuring 2" x twice the width of the dress bottom. I pressed & sewed a 1/4" hem on both sides of the strips then created the ruffle by sewing down the middle of each strip with my tension at the tightest setting and stitch length at the longest. Next, pin the first ruffle strip starting at one side of the front with the bottom of the ruffle lining up with the hem. Continue pinning the second ruffle overlapping slightly in the back and finishing up at the other side of the front.
Step 5
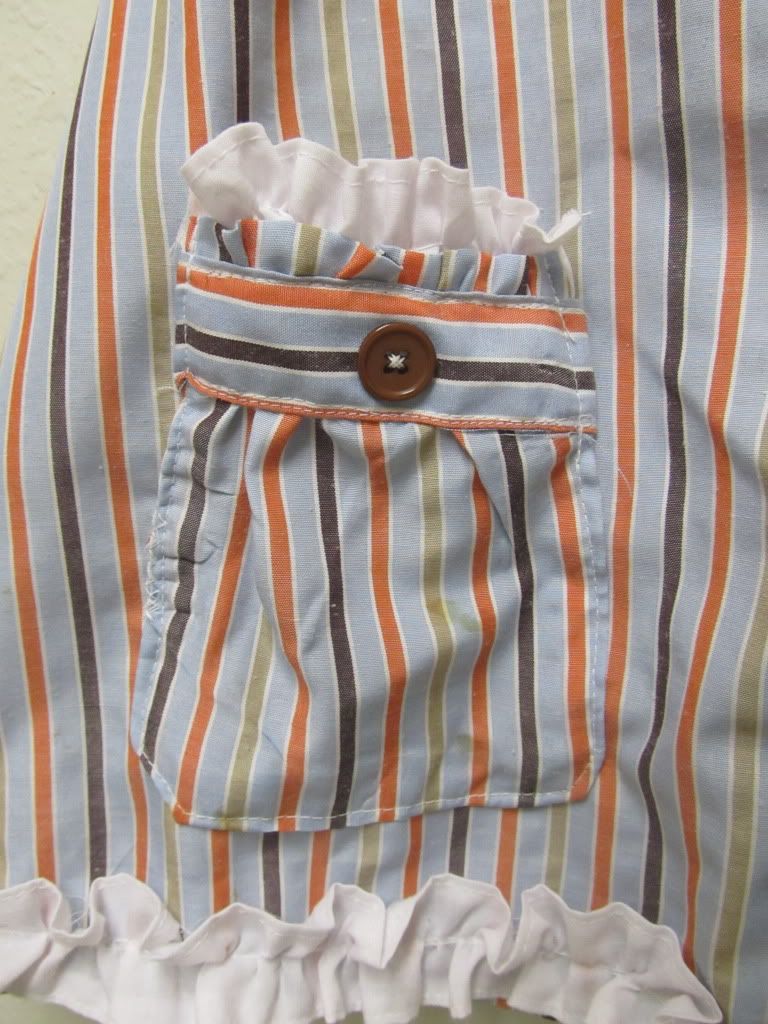
Add a pocket! That pocket you set to the side before can be made new again. I made a gathered pocket method I've used before using this tutorial and put a piece of the collar along the top and some extra ruffle strip.
Step 6
Step 6
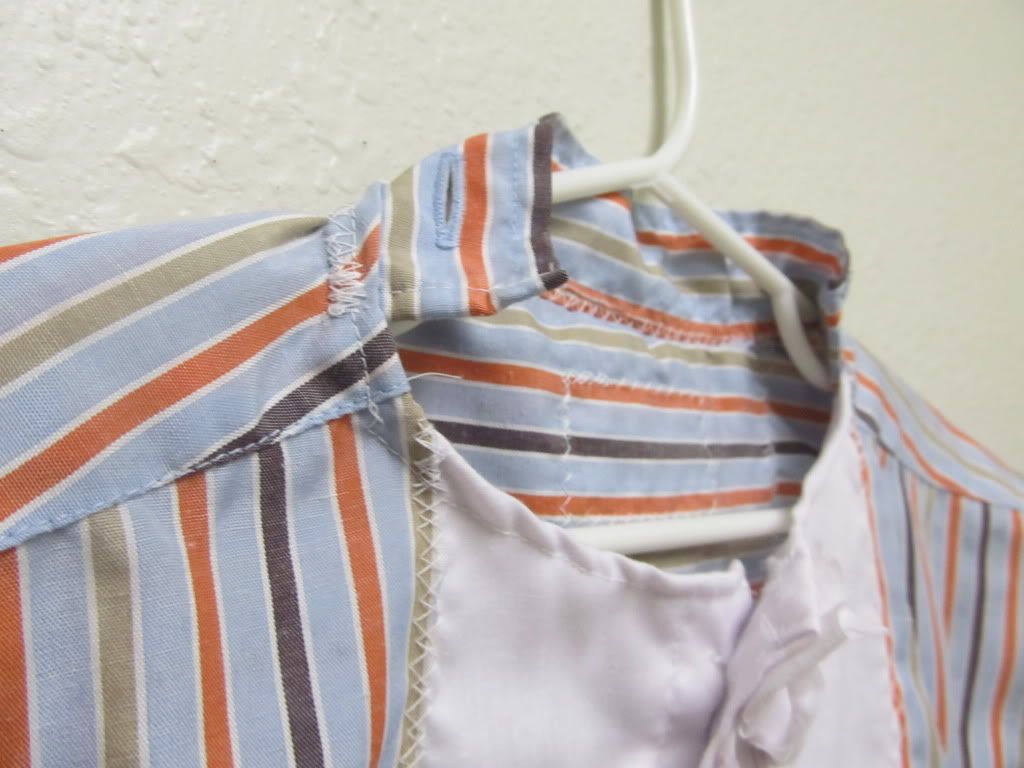
The dress was fine without a collar but seemed a little unfinished. So I hemmed the rest of the old collar and sewed it to the inside of the neckline with a zig zag stitch, about 1/4" overlapping.
Step 7
I don't have pictures showing this step but I replaced all of the original buttons on this shirt. They were originally a shiny off white. My daughter chose tan for the buttons on the stripes, blue for the white {backwards} and I put a brown one on the pocket.
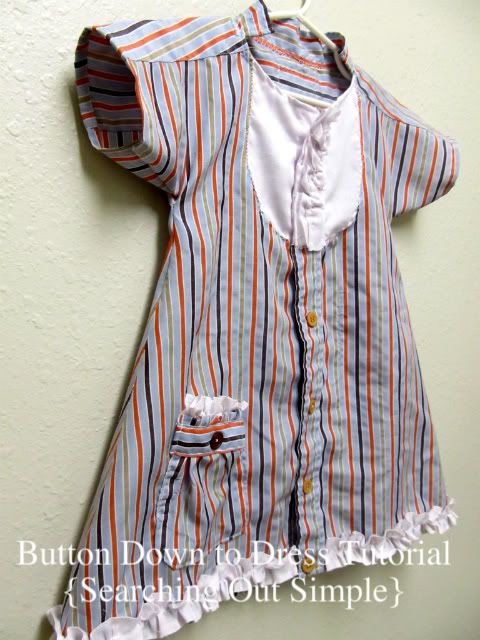
And there you have it!
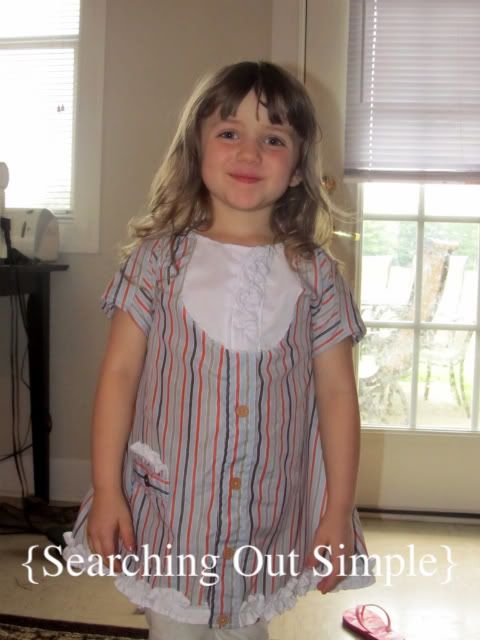
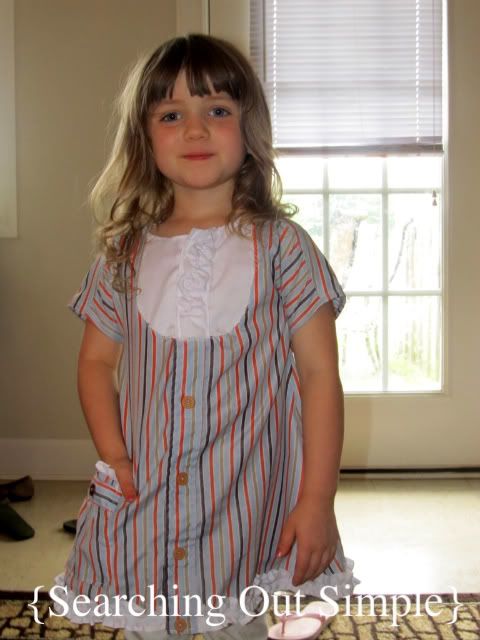
A button down turned dress with a crooked bib, backward buttons, ruffle trim, functioning pocket and little collar. I would still like to add a little button and finishing technique that Jen shared on day 4 of BDR to the sleeves and maybe a little elastic in the back to hold it's shape better but those will have to wait.
I really do love how this dress turned out, though during the process it was one of those things that makes me want to poke myself with a needle in the eye. If you make a dress using this tutorial I'd love to see the finished product! Thank you for having me Jen!
____________________________________________
Thanks, Rebecca!
I've seen so many cute bib shirts and dresses out there, this is definitely something I'll have to try for my daughter. If you haven't already, make sure to check out Rebecca's site, Searching Out Simple, and share some love.
Tomorrow will be the final post in the Button Down Rehab series. I kind of can't believe it, my life has been so full of button down shirts for the past month! I hope you'll drop by for the final post, it's a good one!
Click on the picture below to see the BDR projects you may have missed:
 |  |  |
 |  |  |
 |  |
Glad I could be a part of BDR! =]
ReplyDeleteCute! I love the ruffle along the bottom and the pocket. I think the little collar is adorable :)
ReplyDelete