Sunday, October 30, 2011

Blog Swap with The Dating Divas

Today, I'm doing a blog swap with The Dating Divas! Their website is full of all sorts of great ideas for date nights, crafts, and ways to connect with your family. They make it easy to plan fun events, and even include free printables and great suggestions for those of us who want to plan a great date night, but can't quite connect the dots. But I'll let Cami tell you more!

Hi!  My name is Cami, and I am one of The Dating Divas!  We are a site dedicated to strengthening marriages through actually dating your spouse!  What a crazy concept right?!  Ha, ha!  Our site includes anything from date ideas to family ideas, crafts, romantic ideas, etc.  It's awesome!  So, without further ado please enjoy this AMAZING and cute idea that my fellow diva Lisa M. put together!

* * * * * * * * * * * * * * * * * * * * * * * * * * * * * * *
Can I just tell you that I love my neighborhood! It is soo full of energy and life. Especially since there are many kids the same age of my own which means my older girls always have a friend close by to have a play date with. It's a common thing for them to receive an invitation to a birthday party often. Not only do they love the idea of a party, but getting the invitation is half the fun! A letter with their name on it.....it doesn't get much better than that for a 8- and 9-year-old! So it was no surprise to get an envelope addressed to Maddy and McKenna on our doorstep. The difference was that this invite was not for just any old birthday party. This was a very special card, inviting them to bring Dom and enjoy a "Daddy - Daughter" Day at the park. YAY! I think I may have been equally excited about this idea even though I was the one staying home to care for the younger kidlets.
Come to find out that this idea was thought up by a 7-year-old herself. My friend's daughter asked her mom if she could plan this date. Before her mom could say yes, she had already schemed the whole thing up in her head!! What makes this invite even more unique is that it was put together with glue by the master-mind of this whole event! You would never know that a 7-year-old was so talented! Check out this snazzy little card:


This is such a simple and inexpensive way to bond with the kids we love the most. Not too mention bringing our friends out for the occasion. I was just tickled to see the pics of Dom and the girls playin' it up at the local elementary school park (....bottom pic).


It is so hard for Dads to find time to play with the kids. They are soo busy with work much of the time and we all know they need their downtime too. So for a dad to make time to bond with his kiddos is priceless!

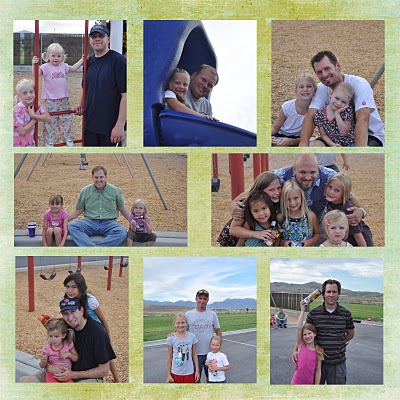
How special is it for Dads to make memories with their kids that mean so much!


A big THANKS to Madison for hosting this fabulous Date! Even if it is impossible for your hubby and kids to get to a park......why not have a "Daddy-Daughter" Date at home!! What better way to show your kids that you love them then by "dating" them this Valentine's season. Love is in the air!

---------------------------------

Thanks for blog swapping with me, Cami! Make sure you go visit The Dating Divas for more great tips and themed events made to bring your family together!

Saturday, October 29, 2011

A Halloween confession

Halloween is 2 days away! I'm all about a holiday that gives me permission to eat a pound of candy without regret. This Halloween is especially exciting for me because I'm taking the kids trick-or-treating for the first time.

Since I was stuck in the hospital on bed rest last year while I was pregnant with Connor, I never got to take Haley trick-or-treating, instead I laid in bed and watched Man vs. Food and ate a whole bag of candy myself (I had a favorite nurse who kept me supplied - it's good to have connections.) This year though, it's on.

For Halloween this year, I made an iPhone costume for Connor, which turned out to be a ton of fun to make. Then, I had to figure out what to do with Haley. She's been obsessed with Rapunzel, so I considered making her a Rapunzel dress but the more I thought about it, the less excited I got. There are so many talented bloggers I've seen who made adorable Rapunzel dresses (here, here and here are just a few great ones) but it just looked like so much work.

After working all day, I come home and want to just lay on the couch, but there's dinner to make and kids to bathe and so really, I wasn't looking forward to sewing on tiny rick rack and puff sleeves. And I felt a little...guilty.

As a craft blogger, I feel pressure to make everything rather than buying stuff from a store. I feel the need to sew every costume, to blog about all my meals, and to make each and every birthday completely handmade complete with little tags and color coded food.

But you know what, who says I have to?

It's OK to buy stuff from stores, that's why there there! It's OK that I didn't make 1, nope not 1 Halloween decoration! It's OK that I didn't throw a Halloween party with themed food. And I'm completely OK with buying my daughter's costume from the Disney store (well actually my in-laws bought it for her, which I'm VERY OK with ;)

So here's Haley in her 100%-not-handmade-Rapunzel-costume. And it's even taken with my iPhone.

I told her, "If you smile I'll give you chocolate!" What a little ham :)

Wednesday, October 26, 2011

Monster Hoodie Refashion: Guest Post with Maybe Matilda

It's an understatement to say that I'm pretty psyched to have Rachel with Maybe Matilda guest posting today. I've always loved her blog because she's funny, honest, and she works magic with crochet hooks. And as someone who can only crochet things that are square or rectangular, that pretty much makes her a superhero in my book. But crocheting is only a part of what Rachel does. I'll let her tell you a little more about herself.

---------------------------------

Hi! I'm Rachel and I blog at Maybe Matilda about crochet, sewing, and clothing refashions. Now, right off the bat, I'm going to warn you: I'm not one of those ladies. You know the kind, with their houses all decked out weeks in advance of every holiday, thoughtful handmade gifts to give, and clean, well-behaved children wearing home-sewn clothes (probably sewn from home-spun fabric, too). 

So I'm going to lay it all out right now: this is the only semi-Halloween-ish item in my home right now. And it's one of the only clothing items I've ever made for my little boy. And I purposely didn't make it too Halloween-ish, because I didn't want it to be limited to wear for the next week or so, so it hardly even counts as a holiday item. And, to top it off, it's dirty in the pictures (which, of course, are fuzzy). Gimme a break--he's a real boy and his clothes stay clean for all of about 20 seconds. If you're still interested and not completely turned off by my lack of mothering superpowers, maybe you'll enjoy this sneaky peeky monster hoodie refashion I pulled together for my little fella:

I have to admit, I think it's pretty cute! I bought him that hoodie a few weeks ago for a few dollars, but he already has a few plain hoodies and I thought maybe he could use one with more character. I reverse appliqued these cute little monster heads onto it, and wild guess here, but I think he might like it!

Here's how I refashioned his little hoodie with some peekaboo monster fun!

You'll just need:
- a hoodie
- knit/jersey fabric scraps
- sewing machine
- hot glue/fabritac
- googly eyes
- felt

I started by sketching and cutting out the monster heads on white paper. I thought it would be cute to have them "peekabooing," if I can make up that word right now, into the sweatshirt, so I drew one popping up out of the pocket and another poking out from the zipper.

Make sure your fabric scraps are a bit larger than the designs you sketched, and pin everything together. The layering, from top to bottom, should be paper, hoodie, fabric scrap.

Now sew around the shape of the pattern sketches--you're not sewing onto the paper, but using it as a shape/guide to sew around. Make sure you're sewing through both the hoodie and the fabric scrap behind it. Try not to stretch the fabric as you sew, and if you get to points or curves that are hard to navigate, just stop sewing while the needle is down in the fabric, lift up the presser foot, and swivel your fabric, then lower the foot and keep sewing. When you're finished, remove the pins and you should have a nice stitched outline of your sketch:

Here's what it'll look like from the back:

I sewed straight over a fabric fold by accident . . . whoops! No biggie--it's in the back, so I just left it. (Perfectionist? Not even a little. I can thank my mother for that--we've jokingly nicknamed her Kathleen "Goodenough" LastName.)

Now trim away the excess fabric from the back, being very careful not to accidentally cut the hoodie fabric.

This is the part that made my heart race. It's a little scary, so be cautious. Carefully, carefully, cut out the monster shape from the hoodie fabric. Make sure you're staying inside the stitching lines, and be very careful not to cut the scrap fabric from the back! It's easiest, I find, to pull the two fabrics apart as much as you can, and use small sharp scissors to start with a little snip in the center of the design:

Then work from there to cut the rest of the fabric away, without getting too close to your stitch line.

Add some googly eyes and teeth cut from a bit of felt, and you're all done! (I used hot glue to attach the googly eyes and felt, and time will tell if that was a poor decision or not. I'm sure something like Fabritac would hold up better in the washer and dryer, so it's possible that my son's hoodie is going to lose its facial features after the first wash. I'll put an update on my blog after it's been washed.)


Thanks for inviting me to write a guest post, Jen, and I hope you guys will come visit me at Maybe Matilda!

 ---------------------------------

Isn't he such a cutie? I just love a little guy in monster gear. Thanks for sharing, Rachel! Make sure you go visit Maybe Matilda and check out her other great tutorials and projects!

Monday, October 24, 2011

No-Sew iPhone Costume


Halloween is 7 days away. Oh wait, you knew that? Apparently I chose to completely forget that fact. And also the part about how my son still had no costume for his first trick-or-treat.

We're not huge into Halloween at my house. I have no decorations up and I still don't have a pumpkin (it's probably a lost cause by now), but there is one thing I celebrate very passionately in October: candy. Halloween has always been all about the candy for me. You can keep your suckers and Pixy Stix (and if you are one of those families that give out toothbrushes I know who you are and I will be skipping your house), give me the chocolate! Specifically the Reese's cups and the Baby Ruths.

As a kid, I always made sure to go through my stash after I went trick-or-treating and pick out the good stuff to hide in my room somewhere because we all know that when parents do the "candy inspection" they're not really looking for needles and opened candy, they're looking for chocolate. Now that I have young kids, you better believe I will be doing plenty of candy inspections myself until the kids catch on.


I was feeling the pressure this past weekend since it's my son's first trick-or-treat experience, but since I was low on time and resources I decided the costume had to be inexpensive, quick, and no-sew since I didn't feel like sitting down to a major project. Then as I was surfing the net for ideas on my iPhone, then I realized the answer was right in front of me. I got to work and whipped this baby up in roughly 1 1/2 hours (the apps were what took the longest to cut out and piece together) and while I made this for my 11-month-old, it would easily make a great costume for any age. And I even designed some apps for you to print and cut out. Consider it your Halloween treat!


Supplies:
  • Shirt that fits to use as a template
  • Felt or fleece for the main fabric
  • Assorted felt squares for the apps
  • Free app template HERE
  • Hot glue gun and hot glue sticks
  • Scissors
  • Disappearing ink marker

Step 1: Make your main piece.

First, fold the piece of felt or flannel that you chose for the main fabric in half with the fold on top. Tuck the sleeves in and lay your template shirt on top of the fabric to determine the length and width you want your final costume to be (extend it 1 1/2 + inches wider on each side to be safe). Using a disappearing ink marker, trace around your shirt where you will be cutting.


Cut out your rectangle, making sure not to cut across the top where your fold is.


Use your template shirt to determine where your neckline should be and how wide and deep it needs to be and mark this with your disappearing ink marker. I would make the neckline slightly larger than your template shirt's neckline because the felt isn't as stretchy as knit.

Use a CD to round each of the corners like an iPhone.


Cut out your neckline and each of your rounded corners.


Step 2: Cut out the detail pieces.

Now, cut out a rectangle for the screen (use a CD to round the edges like you did above), a small rounded rectangle for the earpiece, and a circle and square for the power button. Position and hot glue these components in place.


Step 3: Create your apps.

This was the really fun part! Determine which apps you want to make for your costume. I looked at my phone and picked several of the simpler ones. I designed the 6 you see below and included them HERE if you want to print and cut them out to make yourself. Just cut out each piece on card stock (which I prefer because it's thicker) or regular print paper, and trace onto squares of felt. Cut out each component and hot glue to assemble.


Now, just arrange your apps on the screen and hot glue them down. Simple!


Step 4: Glue sides.

Pretty explanatory. Since the sides are open, you can choose to leave them this way, but I decided to glue the sides together so my little guy couldn't wiggle out. Just lay your template shirt on top of your costume and use your disappearing ink marker to mark where you want the bottom of the sleeve to be. I marked about an inch down from the sleeve on either side. Hot glue the two sides together from this mark to the bottom of the shirt right before it curves.


And there you have it, a super easy no-sew iPhone costume!


Now obviously since this costume is hot glued instead of sewn, it's not machine washable so just wipe any stains with soap and warm water.


Check out my sidebar to see where I link up each week!

Friday, October 21, 2011

Some things in life really are free

So listen, I know I'm about 10 years behind on the whole burlap thing, but if you've been following my blog recently, you know that I'm redoing my craft room (and very slowly might I add) by incorporating a theme around burlap and bees and calling it "Bee Inspired." I wanted to do this particular theme mostly because I love bees, but also because the burlap was free. FREE. And I'm a sucker for free stuff.


While I was visiting my family in Virginia this past summer, my dad happened to mention that he was helping my brother decorate his new apartment because, as we all know, guys need some major help in the decorating department. When I first met my husband, he was living in a house with 3 other guys. In his room he had the following items: an 80's-style particleboard armoire lined with gold paint, an old thrifted TV stand, a tempered glass computer desk (which was the only thing he was allowed to keep by the way), an X-Men poster, and a bookcase that he had fashioned out of cinder blocks and wood planks that he was VERY proud of by the way. If my dad hadn't helped my brother, he too could have had an apartment lined with cinder blocks and X-Men posters. My husband still talks about that X-Men poster.

So anyway, Dad said he had gone to one of the local coffee shops and asked one of the guys for some of their old coffee bags. He had seen some of them hanging on the wall of the coffee shop and thought my brother could use them to decorate the walls of his apartment. And the coffee shop owner gladly forked over 6 of them. For free.

Why have I never thought to ask the local coffee shops for their coffee bags? It's not like they use them, they just toss them in the trash. We went back to that coffee shop and they gladly forked over several more coffee bags. Now, this was a locally-owned coffee shop so I don't know if the big dogs like Starbucks would be willing to part with their coffee bags, but it's worth a try right?

Because if you could get your hands on some free burlap coffee bags, you could make this:


Or some of these:
via

or decorate your kitchen with these:
via
and I definitely want a few of these:
via

and this would look amazing on my dining room table:

Or you could decorate your craft room like me. So if you want some free burlap too, head to your local coffee shop and just ask.

Click on the pictures below to see all my Bee Inspired Craft Room projects so far!


Monday, October 17, 2011

Cheating my way through a winter wardrobe

Thank you to all of you who left your sweet comments on my Babushka Doll Shirt on Monday! I wanted to get you in on a little secret of mine that I applied to that shirt. You might not have noticed, but it's a sneaky trick that I use to winterize Haley and Connor's summer wardrobes.

Did you happen to notice in my previous post that the shirt began as a short-sleeve top and ended up as a long sleeve shirt?


That's because I cheat my way through my kids' winter wardrobe. If I already have a shirt on hand that I want to use for winter but it's short-sleeved, I just add sleeves to it using one of my husband's undershirts. Cheap? Maybe. I prefer "clever." :) Plus, I really like the look of the different colored sleeves.

Since that secret is out now, I might as well share the details with you so you can save some money and cheat your way through your child's winter wardrobe too!

Supplies:
  • Short-sleeve shirt that fits your child
  • White men's undershirt (or any other knit shirt you may want to use)
  • Disappearing ink marker
  • Sewing machine and basic sewing supplies

First, find a long-sleeve shirt that fits your child well. Lay one of the sleeves on top of your knit shirt flush with one of the edges and the bottom of your shirt (this is so you don't need to hem your sleeve). Use your disappearing ink marker to trace around your sleeve, making sure to make a j-like curve at the top where the sleeve meets the shirt. Repeat on the other side edge of your shirt to make 2 sleeves.


After cutting each of your sleeves out, they should look like this when they're open:


Fold them in half long ways with the right sides together, and pin along the long side. Sew down the long side from the edge of your sleeve to the top (make sure you don't sew either of the shorts sides closed!)


Turn your sleeve inside out, and you have a completed sleeve! (sorry, I didn't take a picture of the finished sleeve, but I'm sure you all know what a sleeve looks like :) The long side you just sewed is the bottom of your sleeve.

To attach the long sleeves you just made, turn your shirt inside out and stuff the existing sleeves of your shirt inside. Locate the original seam where the existing sleeves are sewed onto the shirt. This is where you will be attaching your long sleeves you just made.


With your long sleeve right side out, insert the sleeve inside of your shirt's armhole, matching up the raw edges of your sleeve with the edge of the armhole.

Pin your sleeve to the armhole and sew all around the armhole to attach your sleeve.


When you pull your sewn on sleeve inside out, it should look like this:


Turn your whole shirt right side out, and now your short sleeve shirt has been winterized! You can do the same thing with little boy's shirts. It's a little addictive. Especially if you stock up on cheap, end-of-the-season sale shirts from summer.


The only downside is your husband will start to wonder where all his undershirts went. Just tell him you're saving money on your kids' winter wardrobe :)

Wednesday, October 12, 2011

A difficult anniversary

I wrote this post to share with you the details concerning my difficult pregnancies, but also to encourage those of you who have also experienced high-risk pregnancies due to a small cervix. The post is long, but I hope those of you who need it are encouraged by my experience.

Today is an anniversary of sorts. Not a wedding anniversary, but one that changed my life just the same.

A year ago today, I was 31 weeks pregnant with my son. Despite the fact that I was feeling larger by the minute, I had been having a really great pregnancy. I had all the normal pregnant-woman-type things happen to me throughout my pregnancy - strange cravings for hot dogs and Cheetos, exhaustion, soreness - but this one was certainly not going the way it had when I was pregnant with my daughter.

Me 5 months pregnant with Haley and dressed up as a baby for our office Halloween party in '08

For those of you who probably don't know (because I started this blog after I had my daughter), I found out several years ago when I was 11 weeks pregnant with my first that I had a smaller than usual cervix. In order not to bore you or talk to much about girly parts, the cervix basically keeps the bun inside the oven while he/she bakes, then the internal timer goes off at 40 weeks and ding, the baby is done. For someone like me who has a short cervix, the oven door has been broken and the bun could come out of the oven way before it's done baking. This is especially a problem when you're only 11 weeks pregnant.

When I was told this information, I was laying on the exam table getting my first look at my little wiggling fetus on the screen. I wasn't prepared to deal with a faulty cervix, it didn't run in the family as far as I knew. All I knew at the time was that I was having my first child and I was over the top excited about it. My body was supposed to know what to do, I couldn't be bothered by this nonsense about a short cervix. Where was the receipt for this thing anyway? I didn't sign up for a faulty cervix.

As the days went on, I went in for visits every 2 weeks to monitor my cervix to make sure the baby wouldn't be born too early. I loved each visit because it meant that I got to see my little developing baby wiggle and squirm on the ultrasound with each visit. Before we knew that Haley was a girl, we called her Babby, a nickname that stuck with her even for a little while after her birth.

Haley at 22 weeks
Things went well for awhile and little Babby continued to grow, but as we neared Christmas, my faulty cervix had had enough. At one of my routine visits right before a planned road trip to visit my in-laws for Christmas, it was discovered that my cervix had begun to dilate. At only 27 weeks pregnant, I was admitted to the hospital for some tests which proved that I was contracting. I was devastated. There were tears (and a cancelled road trip) and I was told go home on bed rest and to restrict my activity to showers and sandwich making until the baby reached a safe level of maturity to warrant more activity. 

At the time, I was upset to know that I couldn't go about life as usual. As a young, very active person, I hated knowing that I had to be chained to the bed for at least 7 weeks with people waiting on me for all of my needs. This may sound like vacation to you, but believe me when I tell you weeks and weeks of watching TV with no option for any other activity gets pretty old. Looking back, I should have kept my mouth shut and been more thankful for the breakthroughs we've had in medicine that help to prevent people like me from going into labor well before the baby is at a mature level of development.

For someone like me who has a shortened cervix, there is a very real possibility of losing the baby or for the baby to be born too early and have developmental issues. How lucky was I that I had a doctor who knew enough to tell me to shut up, take my medicine, and think about the health of my child?

So I did just that. Except for the one time my in-laws came to town and wheeled me around the outdoor shopping mall in a wheelchair.

Escapee!
Thankfully, my body cooperated a little longer and Haley was born at 35 weeks, perfect in every way. She was tiny at 6 pounds, 2 ounces, but she had no issues whatsoever and was able to leave the hospital after a routine length of time in the hospital.


When I became pregnant with my son, I was prepared for the same song and dance. Every doctor's appointment was nerve wracking as I waited for the nurse to look at the screen and tell me "Your cervix is dilating again, to the hospital with you!" but those words didn't come. My appointments were still more frequent than most because of my previous complications, but by my 25 week check up when I was again told that nothing was wrong, I relaxed with the thought that I was in the clear.

At 30 weeks pregnant, my friends threw me a "baby sprinkle" (a baby shower for someone who has already had a baby before and has most items she needs). I had a great time, and felt completely blessed by all my friends who came. While I was there, I kept feeling what I thought was just the baby repositioning himself. Nothing painful, it just felt like he was poking his head hard into my abdomen.


Me at 30 weeks (photo courtesy of Christan Yarger)


I returned to my appointment several days later for a routine check up and while laying on the exam table getting the ultrasound, I saw a familiar image on the screen. The look on the nurse's face confirmed it. A dilated cervix. After confirming the diagnosis, the nurse left me in a room to wait for my doctor. "How could this happen again?" I wondered, "Everything has been fine." I was again wheeled over to the hospital and plugged up to multiple machines to check my vitals. It was confirmed that I was contracting again. The roller coaster ride began again.

The next 2 days are probably 2 of the worst days of my life. I was put on a high dosage of magnesium right away. If you've never been on magnesium before, it's horrible stuff. It's usually meant to treat seizures and kidney problems, but it's commonly used to stop contractions as well. What it does is relax your muscles, which of course stop the muscles causing the contractions in my case, but it not only relaxes those muscles, it relaxes ALL of your muscles. I had a hard time keeping my eyes open and when I was able to keep them open, I had double vision because my eye muscles were too relaxed. To simply roll over in bed, I had to muster all the strength I had to grasp the handle on the opposite side of the bed and heave myself to the other side. It also makes you nauseous. The only way I can describe being on magnesium is to tell you that it makes you feel like you're drunk, on muscle relaxers, and have the flu at the same time.

Thankfully, the doctors were able to get my contractions to stop and I was eventually able to be taken off the magnesium and have a meal. My friends who threw me the shower came to visit me and brought lots of fun goodies with them to cheer me up (which was my inspiration for The Hospital Survival Kit). One of my favorite things that they brought was a pair of cat socks that weren't very functional, but had great entertainment value.

Cat socks (sorry for the bad quality, it was taken with my phone at the hospital)
I spent the next 4 1/2 weeks on hospital bed rest. I went through a grieving time at first because I couldn't understand how this could happen to me yet again after things were going so well. My doctors had to talk me down quite a few times after begging them to let me go home. As I cried a lot at first, but I eventually understood and agreed with my stay there. I took medications to control my contractions and was constantly monitored. My days were very predictable, but I was also very lucky to have a boss that allowed me to work from the hospital, so that helped me break up the monotony some. I learned to deal with, and eventually tolerate (I can't say like because I would have much rather been at home with my husband and daughter) my stay at the hospital.

I was sent home at 35 weeks, still pregnant and with a good outlook. My son was at a good weight, and he was at a place where his development was not in question. He was born 2 weeks and 2 days after, at 7 pounds even.

Haley meeting her brother for the first time
While it's been hard, I am a better person for all that I went through because I appreciate the blessing that is life that much more. While on hospital bed rest during my last pregnancy,  I heard stories from the nurses of the other girls on my floor who went into labor very early in their pregnancies and gave birth to very small babies with problems, some who did not survive. I am one of the lucky ones who managed to stay pregnant and give birth to 2 healthy babies thanks to God first and foremost, but also thanks to all of the efforts of the doctors and nurses from both pregnancies who took the time to counsel and care for me and my unborn children.


Those who know my history with pregnancies always ask, "Do you think you'll have another?" The answer right now is yes, we have always planned on having a third. We've discussed that topic at length, and our family doesn't feel complete without a third little somebody. All of this of course depends on our financial situation, but we would like to have a third eventually. I know when the time comes, I'll probably have to have a cerclage (where the doctors will sew my cervix closed to keep the baby in until birth), and this is something that I'm nervous about, but I'm more concerned with the health of my future baby.

If you have (or have had) a high-risk pregnancy, I would love to talk to you and encourage you as well as answer any questions you may have to the best of my ability.

Monday, October 10, 2011

Babushka Doll Shirt {a Silhouette Project}

I just love the ladies over at Prudent Baby. They're so sweet every time I talk to them, not to mention all of the great projects they have for mama's and kiddos. They had a contest awhile ago to see who could come up with the cleverest phrase to go along with a Silhouette Babushka Doll cutouts they were giving away. My entry was "Sometimes it's ok to be full of yourself." I thought it was pretty clever. I didn't make first place, but they were sweet enough to humor me and send me a cutout of the doll anyway. Awesome!

I have several babushka dolls that I've collected through the years, and they now sit in Haley's bedroom up on a high shelf along with all the other things she's not allowed to touch. She always asks for them, so I knew she'd love it if I made her a shirt using the babushka doll cutout.


Supplies:
  • Shirt
  • Babushka Doll design in Silhouette Studio
  • Iron on transfer material
  • Sewable interfacing
  • Scrap fabric the same size as your doll cutout
  • Scrap felt for the flower
  • One small button
  • Basic sewing supplies

Step 1: Cut out your 2 doll pieces.

You will need 2 babushka doll cutouts: 1 of the full design on transfer, and the second just a silhouette of your doll in fabric.

First, use your Silhouette to cut your babushka doll design. Weed the excess transfer material, saving the outline of your doll (seen below).


Next, follow the instructions on the sewable interfacing to iron interfacing to the back of your scrap fabric. Using the outline you saved from your babushka doll template, trace your outline on your fabric using a disappearing ink marker.  Cut out.


Iron your babushka doll fabric onto your shirt and sew around the perimeter of the doll.


Step 2: Apply your iron on transfer material.

Now that your design has been weeded, place the design on top of your fabric. Follow Silhouette's instructions to iron the transfer material to your shirt.


I use a little Fabric Fusion to stick down any unruly edges that don't want to be ironed down well.


Step 3: Make your flower embellishment.

Cut two circles out of your felt: one that is 1 inch in diameter, and one that is about 3/4 inches in diameter.


Place your biggest circle on the bottom, then stack the smaller circle on top followed by the button. Hand sew your flower to your shirt.


Not too bad, right? (Besides the fact that you can see the blue disappearing ink marker I used to trace the doll :)

Haley was just happy that I let her play with the dolls during the photo shoot.


Check out my sidebar to see where I link up each week!

LinkWithin

Related Posts with Thumbnails