Showing posts with label Halloween. Show all posts

Monday, November 7, 2011

The Rules of Trick-or-Treat

Thank you all for your sweet comments on the passing of my grandpa on Saturday. All of your prayers and thoughts are greatly appreciated.

I know Halloween was a week ago, but I never got around to posting any pictures until now, so hopefully you don't mind some Halloween pictures and a little rant :)


(we never did get one where both of them were looking at the camera)

This is the first time my husband and I took the kids trick-or-treating so I guess you could call us amateurs, but as someone who trick-or-treated until I was 14 (yes, I just admitted that - I like candy!) I like to think I know how this Halloween thing works.

When I trick-or-treated, I followed a few simple rules:

1. Trick-or-treating begins when it starts to get dark.
2. If you plan on giving out candy, put your porch light on. Extra points for people who put their garage lights on too.
3. If you have your porch light on, I will ring your doorbell and ask for candy.
4. If your porch lights are on and I ring your doorbell, don't act surprised that my I am there and offer me a banana in place of candy.

We took the kids around for an hour and they barely got any candy and most people with their lights on said they didn't have any candy for her. I guess maybe Halloween isn't what I remember as a kid. My brother and I would go out as soon as we possibly could, then trick-or-treat until the last minute. The houses with their porch lights on meant "I have candy, come and get it!" Garage lights alone were iffy, those were probably the people hiding in their living room snickering as poor children rang their doorbells in hopes of candy. And if you were one of the people who left out a bowl of candy, I applaud you.

Near the end, my dad would drive us a few miles down the road where the mansions were and we would get full-sized candy bars. We would come back with several bags full of candy and when we got home, we would dump it all on the floor and sort them into categories: Chocolate, Hard Candies, Gross Candy For Mom and Dad (Dum Dums, Tootsie Rolls, etc.) Then for the next year, we would ration our candy out each day until it was next Halloween.

It was still fun, but I guess I'm a little sad that Halloween isn't what I remember. Or maybe I just went to the wrong neighborhood?

Saturday, October 29, 2011

A Halloween confession

Halloween is 2 days away! I'm all about a holiday that gives me permission to eat a pound of candy without regret. This Halloween is especially exciting for me because I'm taking the kids trick-or-treating for the first time.

Since I was stuck in the hospital on bed rest last year while I was pregnant with Connor, I never got to take Haley trick-or-treating, instead I laid in bed and watched Man vs. Food and ate a whole bag of candy myself (I had a favorite nurse who kept me supplied - it's good to have connections.) This year though, it's on.

For Halloween this year, I made an iPhone costume for Connor, which turned out to be a ton of fun to make. Then, I had to figure out what to do with Haley. She's been obsessed with Rapunzel, so I considered making her a Rapunzel dress but the more I thought about it, the less excited I got. There are so many talented bloggers I've seen who made adorable Rapunzel dresses (here, here and here are just a few great ones) but it just looked like so much work.

After working all day, I come home and want to just lay on the couch, but there's dinner to make and kids to bathe and so really, I wasn't looking forward to sewing on tiny rick rack and puff sleeves. And I felt a little...guilty.

As a craft blogger, I feel pressure to make everything rather than buying stuff from a store. I feel the need to sew every costume, to blog about all my meals, and to make each and every birthday completely handmade complete with little tags and color coded food.

But you know what, who says I have to?

It's OK to buy stuff from stores, that's why there there! It's OK that I didn't make 1, nope not 1 Halloween decoration! It's OK that I didn't throw a Halloween party with themed food. And I'm completely OK with buying my daughter's costume from the Disney store (well actually my in-laws bought it for her, which I'm VERY OK with ;)

So here's Haley in her 100%-not-handmade-Rapunzel-costume. And it's even taken with my iPhone.

I told her, "If you smile I'll give you chocolate!" What a little ham :)

Monday, October 24, 2011

No-Sew iPhone Costume


Halloween is 7 days away. Oh wait, you knew that? Apparently I chose to completely forget that fact. And also the part about how my son still had no costume for his first trick-or-treat.

We're not huge into Halloween at my house. I have no decorations up and I still don't have a pumpkin (it's probably a lost cause by now), but there is one thing I celebrate very passionately in October: candy. Halloween has always been all about the candy for me. You can keep your suckers and Pixy Stix (and if you are one of those families that give out toothbrushes I know who you are and I will be skipping your house), give me the chocolate! Specifically the Reese's cups and the Baby Ruths.

As a kid, I always made sure to go through my stash after I went trick-or-treating and pick out the good stuff to hide in my room somewhere because we all know that when parents do the "candy inspection" they're not really looking for needles and opened candy, they're looking for chocolate. Now that I have young kids, you better believe I will be doing plenty of candy inspections myself until the kids catch on.


I was feeling the pressure this past weekend since it's my son's first trick-or-treat experience, but since I was low on time and resources I decided the costume had to be inexpensive, quick, and no-sew since I didn't feel like sitting down to a major project. Then as I was surfing the net for ideas on my iPhone, then I realized the answer was right in front of me. I got to work and whipped this baby up in roughly 1 1/2 hours (the apps were what took the longest to cut out and piece together) and while I made this for my 11-month-old, it would easily make a great costume for any age. And I even designed some apps for you to print and cut out. Consider it your Halloween treat!


Supplies:
  • Shirt that fits to use as a template
  • Felt or fleece for the main fabric
  • Assorted felt squares for the apps
  • Free app template HERE
  • Hot glue gun and hot glue sticks
  • Scissors
  • Disappearing ink marker

Step 1: Make your main piece.

First, fold the piece of felt or flannel that you chose for the main fabric in half with the fold on top. Tuck the sleeves in and lay your template shirt on top of the fabric to determine the length and width you want your final costume to be (extend it 1 1/2 + inches wider on each side to be safe). Using a disappearing ink marker, trace around your shirt where you will be cutting.


Cut out your rectangle, making sure not to cut across the top where your fold is.


Use your template shirt to determine where your neckline should be and how wide and deep it needs to be and mark this with your disappearing ink marker. I would make the neckline slightly larger than your template shirt's neckline because the felt isn't as stretchy as knit.

Use a CD to round each of the corners like an iPhone.


Cut out your neckline and each of your rounded corners.


Step 2: Cut out the detail pieces.

Now, cut out a rectangle for the screen (use a CD to round the edges like you did above), a small rounded rectangle for the earpiece, and a circle and square for the power button. Position and hot glue these components in place.


Step 3: Create your apps.

This was the really fun part! Determine which apps you want to make for your costume. I looked at my phone and picked several of the simpler ones. I designed the 6 you see below and included them HERE if you want to print and cut them out to make yourself. Just cut out each piece on card stock (which I prefer because it's thicker) or regular print paper, and trace onto squares of felt. Cut out each component and hot glue to assemble.


Now, just arrange your apps on the screen and hot glue them down. Simple!


Step 4: Glue sides.

Pretty explanatory. Since the sides are open, you can choose to leave them this way, but I decided to glue the sides together so my little guy couldn't wiggle out. Just lay your template shirt on top of your costume and use your disappearing ink marker to mark where you want the bottom of the sleeve to be. I marked about an inch down from the sleeve on either side. Hot glue the two sides together from this mark to the bottom of the shirt right before it curves.


And there you have it, a super easy no-sew iPhone costume!


Now obviously since this costume is hot glued instead of sewn, it's not machine washable so just wipe any stains with soap and warm water.


Check out my sidebar to see where I link up each week!

Tuesday, October 4, 2011

Superhero Cape

I remember watching old reruns of the original Batman episodes on TV when I was little and wondering why anyone would want to prance around in their underwear and tights and punch people in the face. Eventually I came to realize that all little boys at one point or another love to play superhero just as much as I loved playing with my Barbies and X-Men (Wolverine and Barbie were on and off for quite a few years.)

Even though my little guy is only interested in gnawing on things at the moment, I'm sure once he gets old enough to find hobbies other than eating he'll want to put on a cape and fight bad guys too. Every little boy wants to be the hero who saves the day, so when my friend made me the Bee Inspired drawing for my craft room, I knew exactly what I wanted to make for her 2 little boys in return.


A superhero cape! If your little guy has a favorite superhero, you could make one with his symbol on it. Or, if you want to make it really special, you could personalize it for your child.

Supplies for a small cape:
  •  Download my free pattern HERE
  • 1 yard knit fabric (you may need more depending on how big your child is)
  • 2 sheets of felt for the collar, and more for the patches on the cape
  • 3 inches of Velcro
  • Craft glue
  • Sewing machine and basic sewing supplies


Step 1: Cut out your pattern pieces.

First, download my pattern HERE. Cut out and tape page 1 to page 2 where indicated. With your knit fabric folded, place your main pattern on top of your fabric with the edge on the fold where indicated. Trace around and cut out. Repeat for a total of 2 pieces, one for the front and one for the back.

You could also use a men's knit shirt to make your cape like I did, in which case you'll fold your shirt in half longways and place your pieced template on the fold like this:


When you trace and cut, you should have 2 pieces.

To cut out your collar, fold your sheet of felt in half and place your collar template on the fold. Cut out 2 of your collar pieces.


Decide what kind of design you want on your cape. This one was made for a friend's son named Sadron the 5th, who goes by the nickname "Five," so I decided to make the patch on his cape play off of his nickname. Make your design in Microsoft Word then cut out your letters and design and use these to trace your design onto your felt. I cut an S and a 5 from felt, as well as a sunburst that I found in Microsoft Clipart.


Glue the pieces of your patch together using the craft glue and let dry.


Step 2: Sew on your patch.

Position your patch on the right side of your cape (the part that everyone will see) and pin.


Sew around the perimeter of your patch and design to secure.


Step 3: Join your front and back pieces.

With the right sides together, pin the sides of your cape and sew around the perimeter, but leave the neck open. Turn your cape inside out through the opening in the neck.


Step 4: Attach the collar.


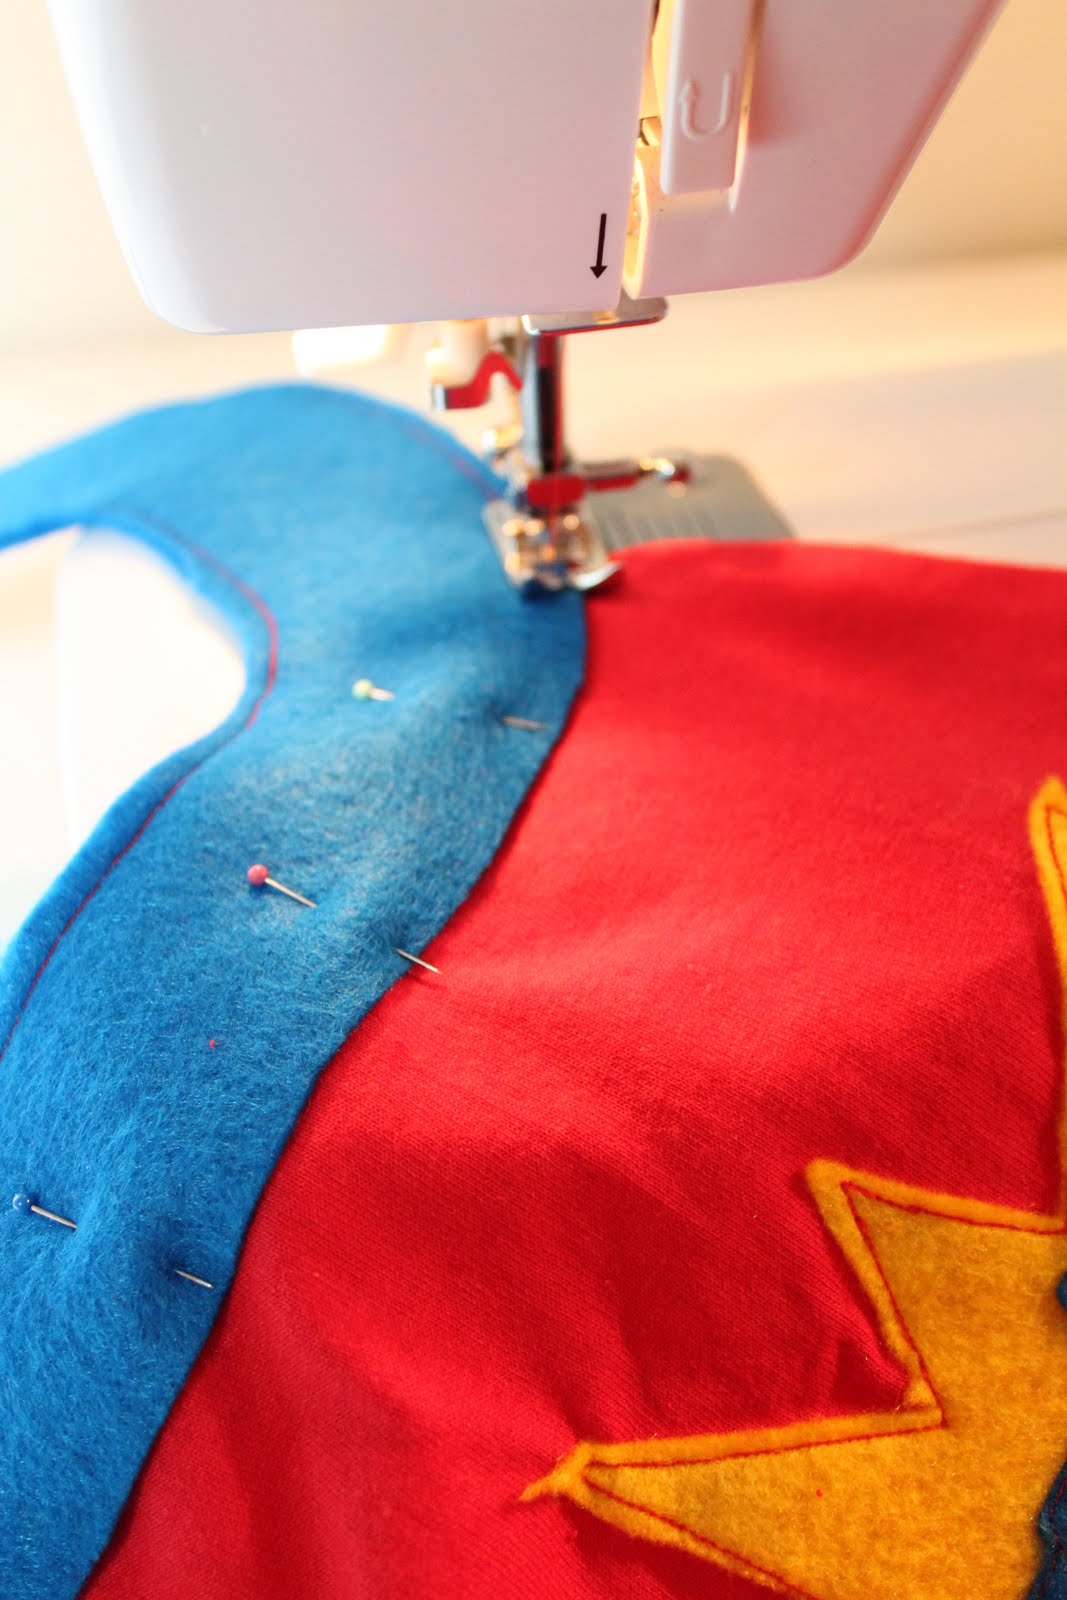
Sandwich the raw edge of your neckline in between your 2 collar pieces and pin.


Sew around the entire perimeter of your collar to finish.


Step 5: Add Velcro.

On the top of the left side of your collar, sew several inches of the hook portion of your Velcro. On the underside of the right side of your collar sew the loop portion of your Velcro.


And now you have your very own personalized superhero cape - or one with his favorite superhero on it.

And if you're wondering why the cape below is gray instead of red, it's because I made it and then realized afterward that I made it way too small for a 6 year old so I had to cut out my patch and start over. Sigh.

Again, why can't my projects just turn out perfectly the first time?


My friend's 3-year-old son was originally supposed to model the cape for me but he decided not to at the last minute, so Connor graciously stepped in - even though the cape is way too big on him.


 "Watch out bad guys!"

 "I'm off to save the day!!


Until the Evil Captain Mommy scooped him up for kisses.


The world is a safer place with my little superhero on duty.

LinkWithin

Related Posts with Thumbnails