Showing posts with label Holidays. Show all posts

Thursday, November 29, 2012

New Holiday Series: Stuff Your Stockings!

Hi everyone, I just wanted to pop in really quickly and remind you to come follow me at my new blog, Eat. Sleep. MAKE. (www.eatsleepmake.com) if you don't already. Shannon (my sister-in-law) and I are having a ton of fun blogging together and sharing some great projects.

On Monday, we're launching a new holiday series called "Stuff Your Stockings", and we've lined up some great guest posters! Click on this link HERE for more information.

 
Hope to see you all there!

Thursday, June 28, 2012

Red, White and Blueberry Trifle

With the 4th of July only 6 days away, I thought I'd share one of my favorite 4th of July treats with you. I shared here on my blog 2 years ago, but I thought it'd be good to share it again since many of you probably haven't read about it yet, and because it's just an amazing dessert :)  


What is a trifle, you ask? It's basically a fancy word for a layered dessert full of yummy things like cheesecake pudding, cake and chocolate. Ever since I started bringing this dessert to my friends' parties, they never let me leave without giving them the recipe. Keep reading to learn how to make one too!

---------------------------------------------------------


I don't know about you, but my favorite thing about the 4th of July (aside from the fireworks) is the food. The 4th is a great excuse to dust off the grill, cut up a giant watermelon, and enjoy time with friends and family between bites of traditional BBQ food.


A few years back, a friend of mine brought a delicious trifle to a BBQ that was unforgettable. I had never had trifle before, but after one bite I was hooked. She gave me the recipe (which is surprisingly simple!) and I've probably made this for friends and family more times than any other dessert since then.


Traditionally, a trifle consists of layers sponge cake with brandy or rum and custard and whipped cream, but there are tons of different variations to this dessert. This particular version has no alcohol in it. The fresh strawberries and blueberries, along with the whipped cream, make this dessert surprisingly refreshing.

Ingredients:
  • 1 box yellow cake mix
  • 2 small packages of Jello brand instant cheesecake pudding
  • 1 large container of fresh strawberries
  • 1 small container of fresh blueberries
  • 1 cup of Cool Whip whipped cream, softened
  • 1 package of white chocolate chips
*Note: If you're making this for a party, make it a few hours ahead rather than overnight. The juices from the strawberries tend to soak the cake somewhat, so this dessert is best served right away.

Recipe:
Prepare cake mix according to package and let cool. (You will only need 1 of the prepared cakes, so only make 1/2 of the box if you want, or you can do what my husband and I do and make both so you can frost and eat the other cake later :) While your cake is cooling, prepare both boxes of pudding according to the directions on the box. Set aside 2/3 cup of pudding to be used for the topping later.

Rinse blueberries and strawberries, then cut up strawberries into slices and coat with sugar if desired.

Cut up cake into bite-sized pieces and layer 1/2 of the pieces in the bottom of a trifle dish or other large glass dish. Layer all of the pudding on top (except your reserve), followed by 1/2 bag of white chocolate chips, 1/2 of the blueberries, 1/2 of the strawberries, and lastly the remaining cake cubes.

Combine the reserved cheesecake pudding with the 1 cup Cool Whip and mix well. Pour mixture over top. Use the remaining fruit and white chocolate chips to decorate the top of the trifle (or just toss them on top, no one will mind, they'll be too busy eating :)

Enjoy!

Check out my sidebar to see where I link up each week!

Monday, May 7, 2012

Mother's Day idea: DIY photo canvas

Mother's Day is coming up this weekend, and I have 0 Mother's Day projects for you. A big, whopping 0. Probably because all I want for Mother's Day is to be served breakfast in bed while I sit around all day watching DVR'd shows and my husband cares for my angelic children and fetches me anything I want.

That's all.

Just kidding, while I know my husband is going to let me relax as much as possible, I realize that I have 2 kids under the age of 4 whose main goal in life is to destroy everything of value, and that means both parents are on Child Watch 24/7. 15 minutes of silence means that somebody probably found the Closet of Forbidden Toys (yes we have one of those) and is currently decorating the hallway with markers. In fact, just 5 minutes ago as I was writing this post I caught my son sucking on the rubber tip from one our door stops. On the plus side, he's probably immune to most sicknesses with all the stuff he's put in his mouth.
 
Even though I'm off the hook, I still wanted to make something for my Mom and Mother-in-Law for Mother's Day. Luckily, Pinterest came through for me again with this awesome idea for a DIY canvas at Sarah's Never Ending Projects. Her brilliant tutorial teaches you how you can make your own photo canvas using your printer, tissue paper and Mod Podge - perfect for Mother's Day.

I got out my supplies while the kids were running around the house like maniacs and whipped this baby out under 30 minutes (minus drying time.)


I used an 8x10 canvas, which left enough room to overlap the canvas on the side with the tissue paper so it looks more like the real deal. I'm super happy with the project, it really looks like I bought it online - minus the couple of spots I rubbed the tissue paper off accidentally. The colors came out a little funky, but that was my printer's fault. I probably should have played with the color a little more before printing. Oh, and if you're wondering why I didn't make one of BOTH of my kids, it's because my son can't sit still for 1 minute so I can get a decent picture of him.


So Mom or MIL if you're reading this, I didn't get you breakfast in bed, but I did get you a picture of one of my angelic children minus the destruction. And if any of your are looking for a great project for Mother's Day, I definitely suggest making a DIY Canvas. I'll be making many more of these for my house once I can get Connor to sit still one of these days.

Monday, April 9, 2012

Easter


I hope everyone had a great Easter yesterday! Since the closest family is 13 hours away, we had a nice relaxing Easter with just the 4 of us. We went to church in the morning, then had an Easter egg hunt in the back yard afterward.


Connor didn't quite understand what he was supposed to do. He ran around the yard with one plastic egg, throwing it on the ground every few minutes. That freed Haley up to get pretty much all of them. Which was fine with her :)


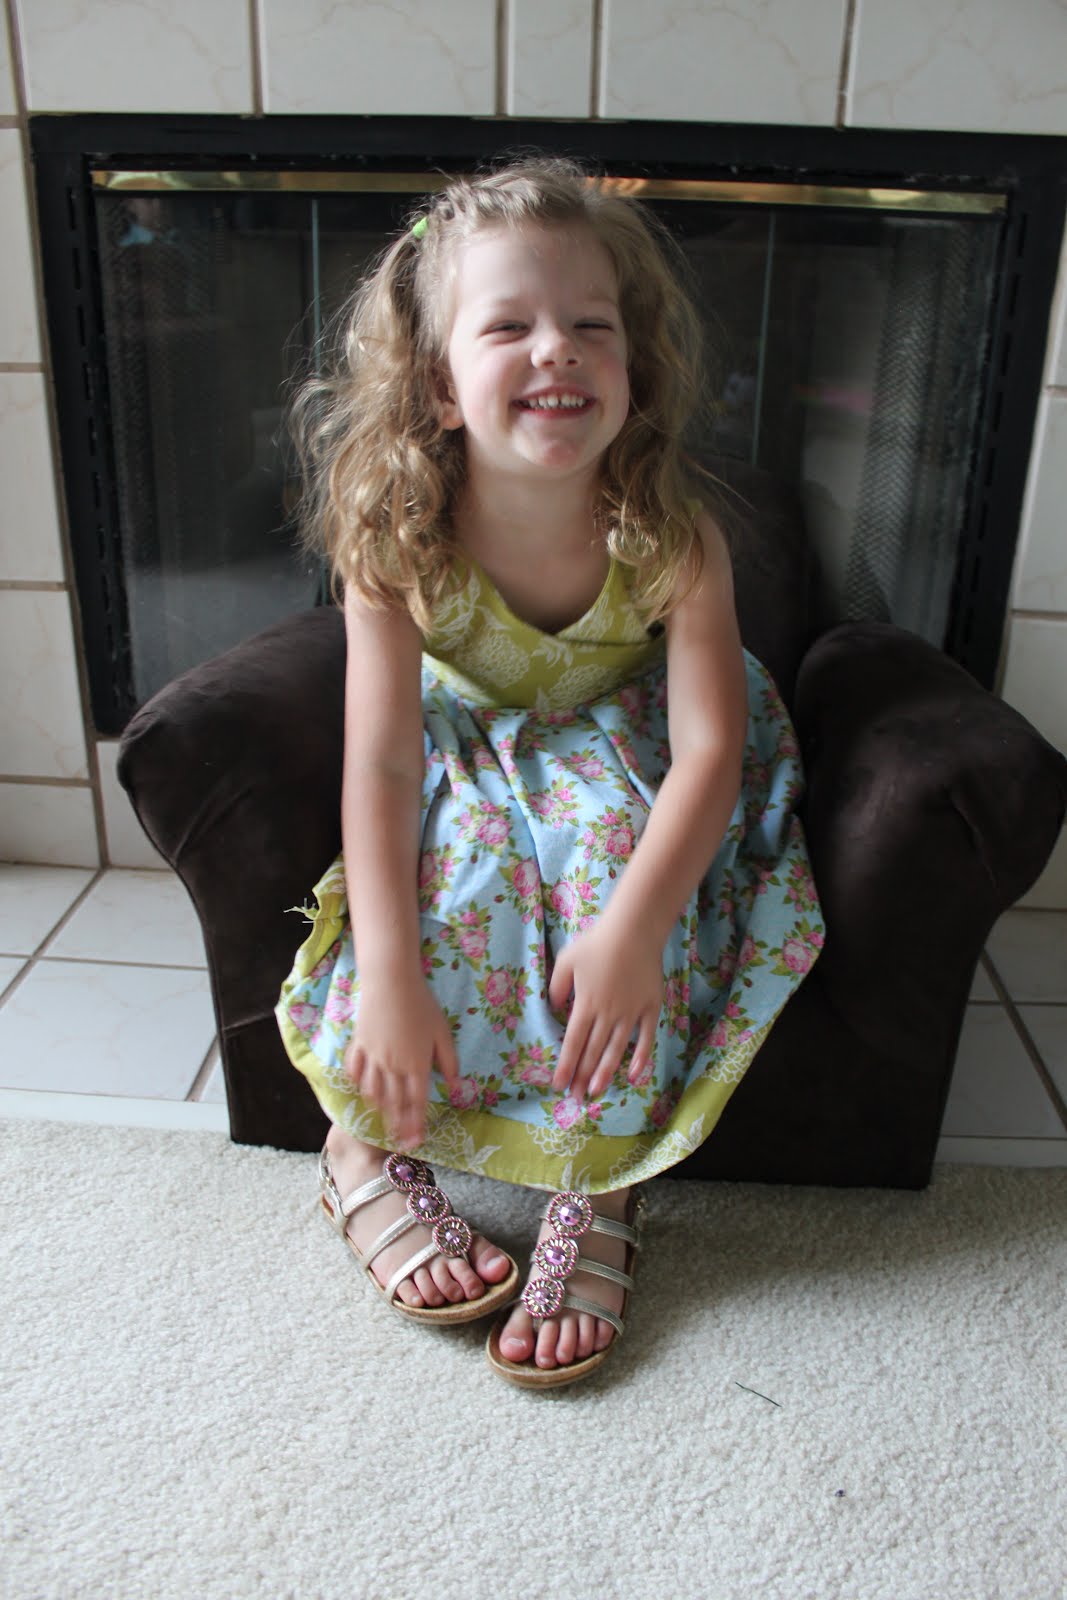
I guess this is also an unofficial sneak peek to a dress tutorial I'll be sharing with you soon :) I've been wanting to make a dress with a crossover bodice for awhile, so a week before Easter I whipped this baby out. Haley loved it too, she wouldn't take it off when we got home from church! That's a win in my book.


After the egg hunt, I thought it'd be nice to get a picture with both kids together since those are so rare. It didn't go well.


Haley was a perfect angel, but Connor ended up doing this most of the time.


I got Haley by herself and she cheesed it up for me :) This kid is going to be a singer or a TV show host, I'm sure of it.


Eventually I got a semi-smile from Connor. I'll take it!


All in all, it was a great Easter weekend. How was yours?

Wednesday, March 14, 2012

Balloon wreath


Of all the things I made for my daughter's Up!-themed birthday party, the balloon wreath is the very first thing I did. Since a major part of the movie Up! is centered around balloons, I knew I had to make a balloon wreath for the front door to set the theme. I got the inspiration for the wreath from this one on How Does She? I put my own spin on it, and this is what I came up with!

Supplies:
  • Styrofoam wreath form
  • Crepe paper
  • Balloons
  • Greening pins (u-shaped pins found in the flower arranging section)
  • Embroidery floss
  • Hot glue

First, wrap your wreath form in crepe paper, gluing at the ends with hot glue. If you want to use something sturdier, wrap your wreath form in fabric. I went the easy route, but crepe paper is fragile so you have to watch out for tears as you wrap.


Next, take your greening pins and a balloon and stick them to your wreath form. You want to push the greening pin in around the middle of the balloon to secure. Make sure your balloons are close together so they hide the greening pins.


Repeat this process to make a cluster of balloons. To finish, wrap some embroidery floss around the wreath and glue at the ends.


And now you have a cute balloon wreath, perfect for an Up! birthday...or any birthday party really.


Check out my sidebar to see where I link up each week!

Friday, February 10, 2012

DIY Valentines Roundup

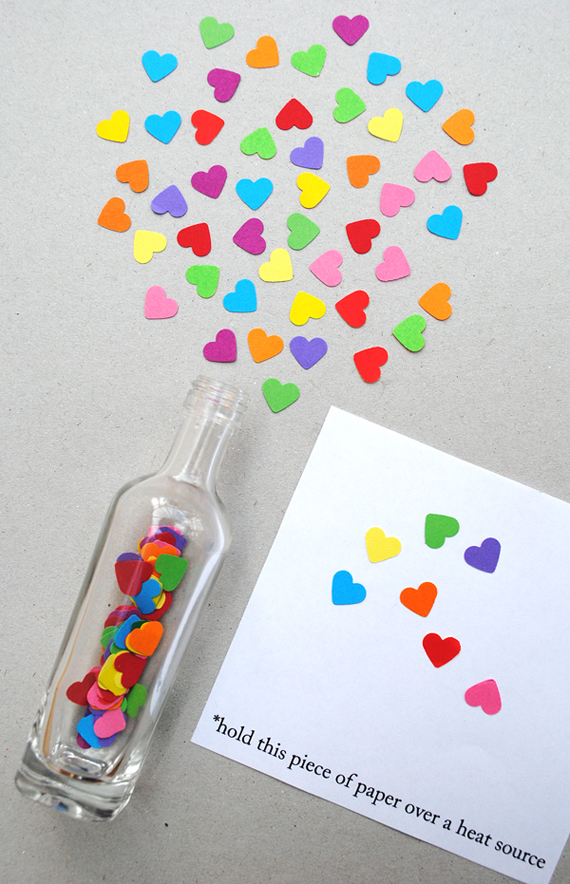
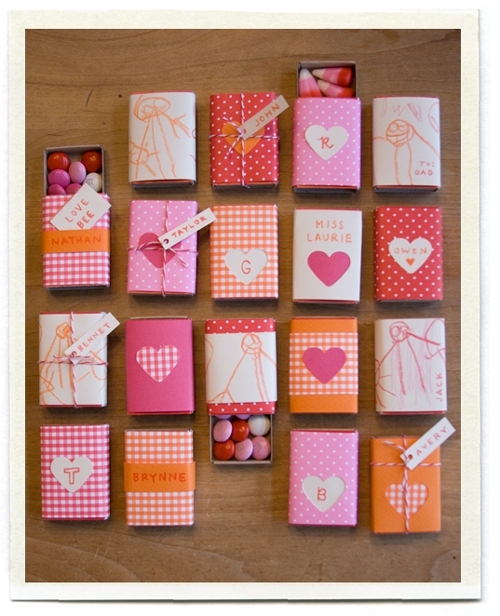
Need some fun ideas for last-minute valentines that you can make yourself? Here are a few great ideas I've spotted around the web!


Matchbox valentines @ Inchmark

 Valentine fish bowls @ Faboolous

Hopefully this roundup inspires you to try your hand at making your own unique valentines this year. Happy (Valentine) crafting!

Monday, February 6, 2012

Perfect printable

How many people can say that they first met in the check out line of a Mongolian restaurant, or that they walked down the aisle to "Afternoon Delight" after they were married? If you can answer "yes" to both of those question, we have to talk because we NEED to be friends.

When I first met my future husband, he was this brilliant, handsome grad student, and I was a naive girl with no idea of what was best for me. After a brief conversation that first fateful afternoon at the Mongolian restaurant, we met again a week later at a friend's birthday party. Patrick, who I was about to find out was as much of an Anchorman fan as I was, randomly burst into a chorus of "Afternoon Delight" in the parking lot. I began to harmonize with him for several verses, and from then on, we knew that we were both equally as weird, so we had to be meant for each other.

Our relationship has always been unique. We were engaged 4 months after we started dating, I was pregnant a month and a half after we got married, and baby number two followed not long after. Nothing was ever forced with us, it just felt.....well, perfect.

Of course, no one is perfect. When we first got married, one of our first arguments involved me yelling at Patrick for leaving a dirty bowl in the sink for days without washing it because as EVERYONE knows, you're supposed to rinse the bowl out and put it in the dishwasher as soon as you're finished. Consequently, I also learned that it's weird and annoying when I leave multiple used paper towels laying around on the kitchen sink to use for later.

Apparently I'm less than perfect too.

Isn't that what love is all about anyway? Finding that one person who loves and accepts you despite all of your imperfections? I know it's true for me, and I wanted to free printable in recognition of all of our perfect imperfections.

Click HERE or click on the picture below to be taken to Google Docs where you can download this free printable in your choice of yellow, turquoise or gray, size 8x10.


And in case you were wondering, yes, I still leave paper towels laying around the kitchen.

Check out my sidebar to see where I link up each week!

Monday, January 30, 2012

"I was soapin' you'd be mine" Valentine gift {soap tutorial and free printables}


After my recent adventures in soap making, I got a little hooked. I just can't tell you how easy it is! I'm doing the 'melt and pour' method of soap making though, the kind where all I have to do is....well, melt and pour the soap.

When I told my husband that I learned how to make soap, he pointed out that I'm not actually making the soap, I'm just mixing it. Way to crush my little crafting heart. Next time he goes to play one of his computer games I'm going to remind him that he's not actually a wizard.

So there.  

So back to making soap. I have these cute silicone heart molds that were meant for muffins, but why make muffins when I could have a year's supply of heart soap? I also included some free downloadable tags so you can give them as gifts.


Supplies:
  • Glycerin soap 
  • Red food dye 
  • Silicon heart mold
  • Fragrance of your choice
  • Cellophane baggies
  • Free printable tags HERE
  • Ribbon
  • Cardstock
  • Hole punch
  • Decorative edge scissors

First, follow the instructions on the back of your glycerin soap to melt your soap in small batches (5 or so ounces at a time). I like to use a kitchen scale to weigh out the soap, then melt it in a clear measuring cup to make it easier to pour.


After you have your soap melted down, stir in your desired amount of food coloring until the color you want is achieved. Next add your fragrance according to the package directions.


Pour your soap into the mold and allow it to dry. Mine took approximately 30 minutes, but time will vary based on size of the mold and amount of soap.


After it's cooled, pop your soaps out of the mold, and it's ready to be bagged!


I made some free downloadable gift tags that you can download HERE. Just print on cardstock and use decorative scissors to cut them out.


To package my soaps, I put a couple of them in a cellophane bag and tied it with ribbon. Then, I punched a hole in one of the sides of the tags and threaded one of the ends of the ribbon through it.


Simple and cute. These heart soaps would make a great Valentine gift for co-workers or friends!


Check out my sidebar to see where I link up each week!

Friday, January 20, 2012

Heart doily shirt

I don't really decorate or do much for Valentines Day (aside from going out to dinner with Patrick), but this year I wanted to make something fun for my daughter to wear. I recently picked up a pack of paper heart doilies and immediately remembered a project I saw on Maybe Matilda awhile ago.

Rachel uses doilies and fabric paint to make a cute shirt for herself and, while I've tried several times in the past, I can't ever seem to make anything cute for myself. I get a vision for a cute article of clothing, and then I put all this time and effort into making it only to have it turn into a complete train wreck. Children's clothing is just so much more forgiving. So, until I can teach myself to make decent adult clothing, I've learned to stick with what I know, so I made one of Rachel's painted doily shirts for Haley!


I used pink and red fabric paint and layered the hearts on a plain long-sleeved shirt.


It turned out so cute!


This method of using doilies to paint a shirt would really be great for any holiday. I'll definitely be trying it again. If you're looking for a quick, inexpensive idea for Valentine's Day, grab a pack of doilies and make one of Rachel's painted doily shirts!

Check out my sidebar to see where I link up each week!

Wednesday, January 4, 2012

I'm back!

Happy 2012! I hope everyone had a great holiday break, I know we did! We took a 10-day long vacation to visit family and friends in Pittsburgh for the holidays. It was really great to unwind, recharge and just enjoy spending time with everyone.

These two had an especially good time over the break. They were spoiled rotten for Christmas with tons of gifts from both sides of the family. I feel like I could easily open my own Toys R Us in my house right now.

(Sorry in advance for the photo bombing!)


We made up for lost time and spent lots of time with family. It was nice to just sit around and laugh with each other. We also ate a lot of really good food, which I will be making up for over the next few weeks :)


I'm glad we ended up not getting a Christmas tree. Yaya and Papa (my husband's parents) had at least 4 decorated trees that I can remember. There may have been more.


While we were in town, we also got to celebrate our little niece Avalene's second birthday.


The party was "snow" themed, so we pretty much added lots of snowflakes to the existing Christmas decorations and made our own little winter wonderland. My sister-in-law, Shannon, was the mastermind behind pretty much all of the decor.

I just loved her winter scene on the table, complete with little snowy cupcakes!


Above the table, we strung lights and little tissue paper poufs.


I used my Silhouette to cut out lots of snowflakes to make garlands and hang from the ceiling.


And for the party favors, Shannon used mason jars, hobby trees, and plastic animals to make snow globes. There were so adorable!


For the food, there was a pasta bar with all of the fixin's. (PS you know you're a blogger when you stand off to the side taking artsy pictures of mushrooms and olives.)


We had such a great time but like always, the time spent with family was too short. I'm looking forward to a new year with lots more great memories!

LinkWithin

Related Posts with Thumbnails