

I'm a sucker for little girls' dresses, not that my daughter needs anymore dresses. I'm pretty sure my 3-year-old has more clothes then me, and DEFINITELY more dresses than me. When I was her age, I only wore dresses when my mother forced me into them on Sundays. These days, I'm only too happy to make my daughter wear them as much as possible until she realizes how comfortable jeans and t-shirts are over frilly girly dresses. And before she catches Bieber fever.
Sigh.
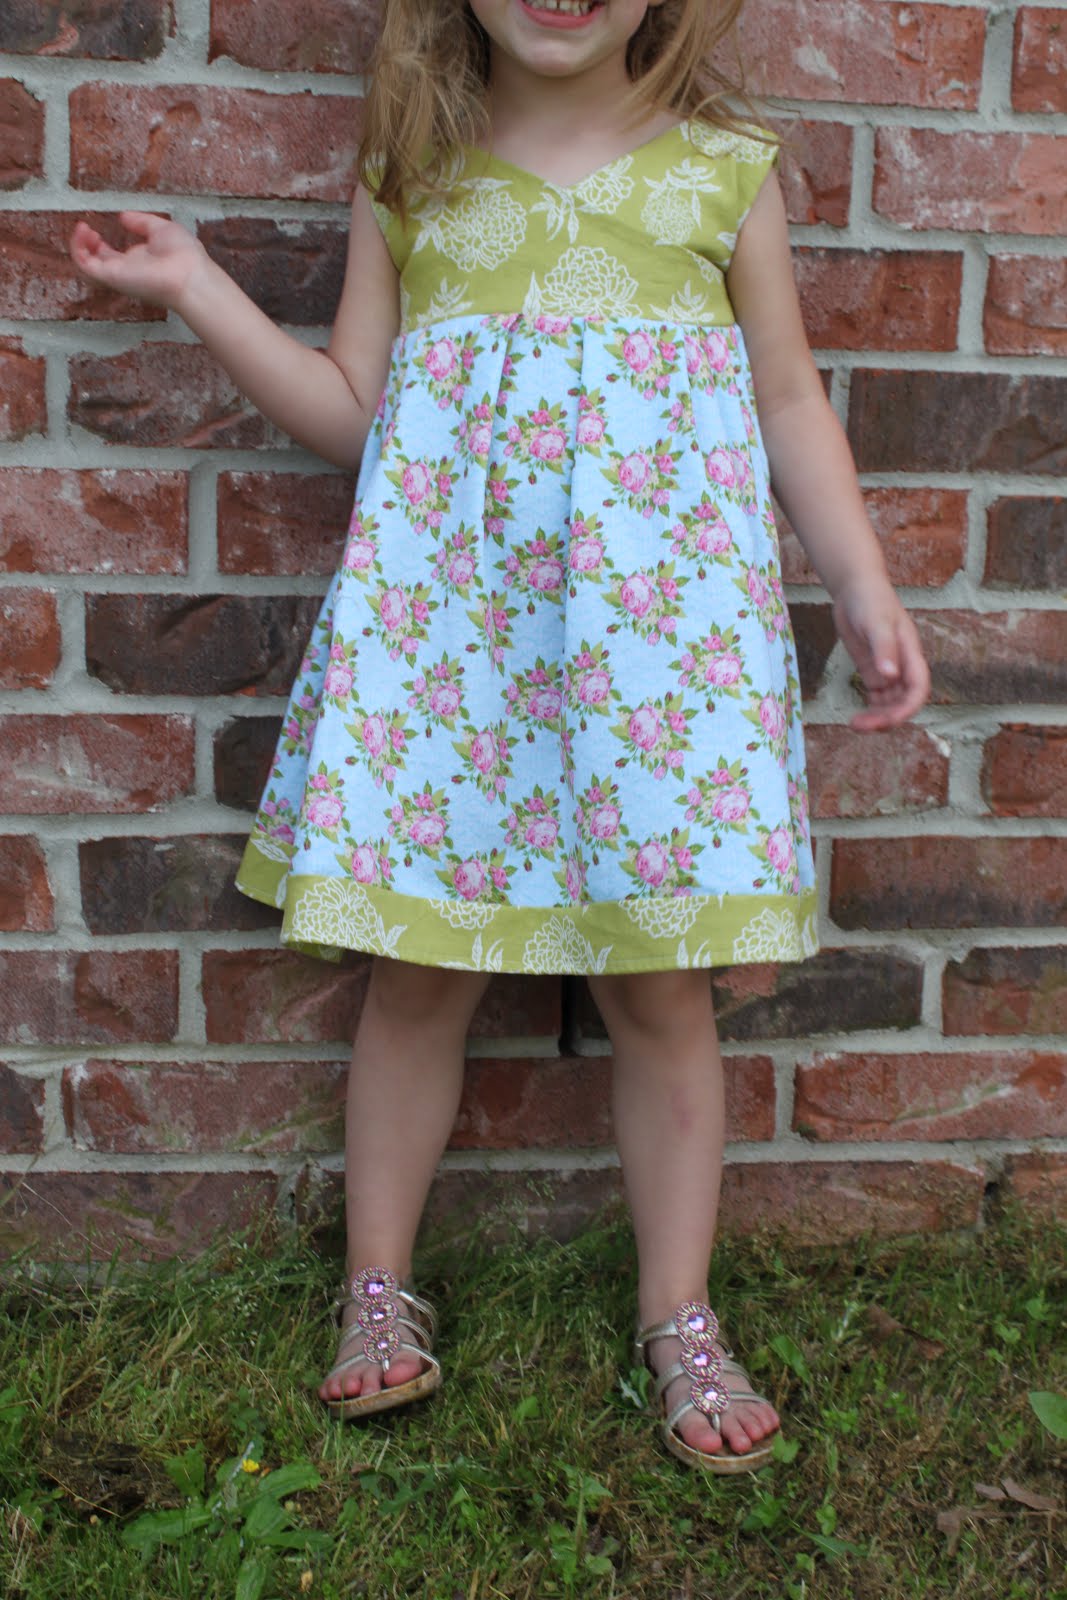
I actually made this dress for Haley for Easter and mentioned it in this post, but I'm excited to share it with you! I've been dying to try my hand at making a dress with a crossover front, and I'm happy to say this dress turned out pretty darn awesome. In fact, I couldn't get Haley to take the dress of after church. That is what we call a win.
Supplies (based on 3t/4t size):
- 1 yard cotton fabric
- 1/2 yard coordinating fabric
- Paper to make your pattern
- Shirt that fits your child well to make the pattern
- 3 buttons
- Disappearing ink marker
- Sewing machine and sewing supplies
First, you'll need to make your pattern. I made my pieces by first laying out a shirt that fits my daughter and drawing around it to make two bodices.

Next, I drew a line from the neckline to the armpit to make the crossover bodice. For the back piece, I just cut my pattern piece down the middle.

Step 2: Join your pieces.
Now to cut out your pattern pieces. You need 2 of each piece, a front and a back for each since the bodice has a lining. You can do this easily by folding your fabric with the right sides together and cutting out your pattern pieces, giving you 2 of each. You'll end up with 4 front bodice pieces (a front and a lining for each) and 4 back pieces (a front and a lining for each.) When you cut out your 4 back pieces, make sure to add 1 inch to the center of each for the button placket. Make sense?

Place your pieces with the right sides together and sew along the lines indicated below. You'll be leaving your shoulders and bottom of each unsewn.

Turn your pieces right side out and iron.To make the next steps easier, I numbered each of the pieces. The two front bodice pieces are 1 and 2, and the back pieces are 3 and 4.

First fold the raw edge of the open shoulder of 1 inside itself and iron so that the raw edge is enclosed inside. Insert the shoulder piece of 3 inside 1 as shown below, and pin and sew straight across to finish. Repeat with pieces 2 and 4.

Here's how your finished bodice should look after the shoulders have been joined. Match up the side pieces of your front bodice. Your back pieces should overlap an inch to account for the button placket.

(Not shown) at this point, you should fold your bodice onto your back piece with the right sides together and match up the sides. Sew so that sides of the front and back of your bodice are now joined.
Step 3: Make your bottom panel.
Determine how long your bottom panel will need to be and subtract 2 inches. Now, measure the length of your bodice and multiply by 2. Cut two pieces of fabric this length and width from your for the bottom of your dress. Also cut 2 strips of fabric this same length and 3 inches wide for the accent fabric at the bottom.

Attach your fabric strips to the bottom of your panels by placing the pieces right sides together and pinning. Sew to attach and serge or zig zag the raw edges where the panel and accent fabric were joined. After the accent fabric has been added, hem the bottom of your piece to hide the raw edge. Repeat with your other fabric strip and panel.

Now you'll need to gather your fabric. Sew a basting stitch (the longest length and width on your machine) straight across the top of your panel. Gather the fabric until your panel is the same width of your bodice. Repeat with the other panel, and then place the two pieces right sides together and sew up the sides so you have a tube. You could also make pleats instead (which is what I ended up going back and doing when I made the dress a little too big!)

Step 4: Attach your bodice to the bottom of your dress.
You should have 2 main pieces now, your bodice and the bottom of your dress. To attach the two, first make sure your bodice is right side out and the bottom of your dress is inside out. Also make sure that the back pieces are folded over correctly (left side should be overlapping right) and pin in place.
Insert your bodice into your gathered tube and match up the raw edges. Pin all the way around and sew. Finish your edges by serging or zig-zagging.

Now just make your button holes and sew on your buttons!

Now you have a new pretty spring dress (or an Easter dress in my case :)


This is actually the first dress I made for Haley that she's refused to take off. That does a mama's heart good.


Check out my sidebar to see where I link up each week!
It's sooooo pretty!!!!
ReplyDeleteThis dress is adorable. I have a 10 month old grandaughter and her closet is rediculous. Thanks for sharing your talents!!
ReplyDeleteWhat a sweet little dress! Great tutorial... thanks for sharing :)
ReplyDeleteThe dress is fabulous and I really love the colors. Thanks for sharing!
ReplyDeleteCute dress Jen! I love your fabric choices together!
ReplyDeleteHow sweet......….I'd like to invite you to share this @CountryMommaCooks Saturday Link and Greet Party(now-Sunday)…..have a wonderful weekend:)
ReplyDeleteWhat a sweet little dress! Thank you so much for linking up to Made With Love at Sew Chatty today! Have a great week!
ReplyDeleteWhat a sweet dress, thank you for sharing the great tutorial too!
ReplyDeleteSuper cute and great tutorial!!
ReplyDeleteSO cute! Thanks for taking the time to post the tutorial - you made it look quite do-able!
ReplyDelete