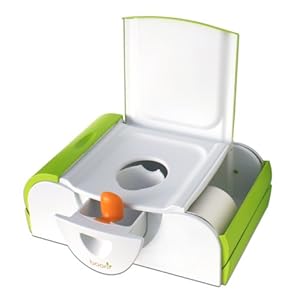
When she first started potty training, we bought my daughter a couple packages of "big girl underwear" to use. Since she's now officially potty trained, she needed more pairs than we had originally purchased. I had a lot of knit fabric laying around, so I thought it'd be fun to make her some myself!
I will say that it took me a lot longer than anticipated to make underwear, but it's fun to see my daughter running around in underwear I made myself. I think it would also be fun to involve your child in making her own Big Girl Underwear by allowing her to use a stamp and some fabric paint or fabric markers to make designs on her underwear to get her excited about potty training.
Supplies for Girl's 2T/3T Underwear:
- Download the free pattern HERE
- Knit fabric for main pieces and bias tape (I used some t-shirts I had sitting around - don't use really thin knit though! Comfy jersey shirts work well for this.)
- 1/4 inch elastic
- Ballpoint needle (helps a ton when sewing with knit fabric)
- Sewing machine and basic sewing supplies
Step 1: Cut out your pieces.
Download and cut out your pattern pieces and place them on top of your knit fabric Trace around your pattern pieces and cut out. You should now have 3 pieces (left to right): your front piece your crotch piece and your back piece.
Step 2: Sew the front and back pieces together.
Place your front piece on top of your back piece, right sides together. Match up the edges of the crotch area and pin.
Sew straight across to join. When you open your piece up, it should look like this with the line you just sewed on the inside of the underwear:
Next, take your crotch piece and iron down each end 1/4 inch. Place on top of the crotch area, ironed side down, making sure to overlap the edge of your crotch piece with the edge you just sewed on the underwear. Pin and sew both ends down.
Step 3: Add bias tape.
You can buy bias tape from the store, but I chose to make my own out of knit fabric because it's much more comfortable for little legs.
To make your own, cut strips 2 inches wide and 13 inches long from your knit fabric. Fold your piece in half wrong sides together and iron, then fold either side toward the crease in the middle and iron. That's it!
Line each leg with the bias tape by sandwiching the raw edge of your fabric inside of the bias tape. Pin and sew down the length of each leg. This is the easy way of sewing bias tape on. I won't bore you with the details of the hard (and proper) way of sewing on bias tape :)
Step 4: Finish the leg holes.
Cut 13 1/2 inches of 1/4 inch elastic for each leg and use a safety pin to thread it through one of the openings of your bias tape on each leg hole.
Let the ends of the elastic stick out the ends of the leg holes a little.
With your underwear inside out, match up the sides and pin from the waist to the top of the leg hole. Sew the sides closed, making sure you catch both ends of the elastic when you sew.
Trim off any additional fabric and elastic that still may be sticking out.
Step 5: Create your waistband.
With the underwear still inside out, fold the waistband 1/4 inch and iron, then fold down another 1/4 inch and iron. Sew your waistband closed.
Cut 19 inches of elastic and use a safety pin to thread it through your waistband.
And now you have a homemade pair of big girl underwear for your big girl!
I won't embarrass my daughter by posting pictures of her little bum in underwear all over the internet, but just know that she loves them :)
Do you have a little boy who's potty training? There's a great tutorial over at Home Sweet Homebodies on how to make your own Easy On Potty Training Pants for little boys.
Check out my sidebar to see where I link up each week!


