Showing posts with label fashion. Show all posts

Wednesday, June 13, 2012

Wire wrapped gemstone tutorial


As I mentioned yesterday, we just got back from a relaxing vacation to Asheville, NC. While we were there, we also visited the town of Chimney Rock, which happens to have some of the cutest shops with killer deals, including these amazing new moccasins that I've been trying to wear with every outfit I own. One of my favorite parts was gem mining, where we got a big bucket full of sand and gems that we sifted through to find our treasures. We were total tourists, but it was a blast. Especially when we came back with bags full of these:


Of course, I couldn't just let these pretty gems just sit around, so I thought I'd show you a quick tutorial on how to turn rough (uncut, unpolished) gems into great little charms for necklaces or bracelets. Please keep in mind that I've never done this before and I'm sure there's a much better technique, but it worked for me! Also, this works best with gems that have rough edges to catch the beading wire on.

Supplies:
  • Rough gems
  • 20 gauge (or more) beading wire
  • Round nose pliers
  • Wire cutters
  • Jump ring
  • Jewelry glue (optional)

Start by placing the end of the silver beading wire on the middle of the back of your gem. Begin carefully and slowly wrapping the wire around your gem, making sure to overlap the end of your beading wire. Once you feel like you've secured the gem properly, cut the end of your wire roughly 1 1/2 inches from your gem with wire cutters. Twist your wire up through your last row, and use your round nose pliers to create a loop. Snip extra. Finish by adding a jump ring. If you want to be extra careful, dab a few drops of jewelry glue where the wire meets the gemstone.


You could leave your charm by itself, or add other embellishments like feathers or beads. Have fun turning your treasures into jewelry!

Check out my sidebar to see where I link up each week!

Monday, January 9, 2012

Mitten Pocket Shirt


I have a thing for appliqued shirts (if that wasn't abundantly obvious.) Probably because of the instant gratification they give me. I get a cute shirt in half the time without having to make the actual shirt itself, and that leaves me more time for really important things, think like eating bowls of Oh's cereal while catching up on my DVR'd episodes of Chopped (there's just something so intriguing about watching four people frantically attempt to make an appetizer out of stuff like candy canes, lamb chops, and pancake mix.)

I get inspiration from so many different things that I have to keep a running list in my phone. For this project, my inspiration was a mitten. Originally, I had a vision of making a cute ruffled dress for my daughter with striped mitten pockets. The dress became a shirt, then the stripes became hearts but hey, at least my mitten pockets remained unchanged.

Wanna make one too?


Supplies:
  • Shirt
  • Scraps of knit fabric
  • Ric-rac
  • 2 buttons
  • Sewing machine and basic sewing supplies
  • Free mitten template for download HERE

Step 1: Make your mittens.

First, print and cut out my mitten template. Using a disappearing ink marker, trace the template onto your knit fabric. Flip your template and trace a second mitten. Cut out.


Next, fold the bottom of your mitten up 1/4 inch and press. Fold up another 1/4 inch and press. Using a zig-zag stitch and coordinating thread, stitch straight across.


Step 2: Attach your mittens.

Now you need to enclose the raw edges of your mittens. We'll do this with a gathering stitch. Set your stitch width and length to their highest settings and stitch 1/4 inch around the perimeter of your mitten, making sure not to backstitch at the beginning or end. Leave the tails long for gathering.


Tie the tails at one end of your mitten in a knot. At the other end, pull gently on one of your threads and push the fabric away from the thread to form gathers. You'll have to work to distribute the gathers evenly around the mittens, especially around the thumbs. You want to gather just enough to keep the raw edges of your mittens underneath so that they're not exposed when you sew your pockets on.


Place your mitten pockets on the top of your shirt and make sure they're lined up exactly where you want them. Now pin pin pin.


Make sure you're happy with the placement because there's no going back once you stitch everything in place!


Once you have your mittens pinned where you want them, use your coordinating thread to stitch your mitten pocket in place using a 1/4 inch seam allowance (don't sew the top closed :) Add some ric-rac for the string (stitch down with coordinating thread) and a couple buttons for decoration.


Here's a close-up of the pocket detail.


The pockets are a great place for kids to hide their treasures.


The pockets are also really great for blogging mommies to hide the bribes for photo sessions (smile if you want chocolate!)


Check out my sidebar to see where I link up each week!
Visit thecsiproject.com

Saturday, November 19, 2011

Guest posting on Sugar Bee Crafts

I'm over at Sugar Bee Crafts today taking part in Mandy's Guest Blogger Extravaganza! Today, I turned my son into an acorn with this little number:


The Acorn Knot Hat serves two purposes:

1. It keeps Connor's head warm.
2. More importantly, I think it'd be really funny to whip this picture out one day when Connor is 16 and getting ready to head out the door with his homecoming date. Revenge for those nights you kept me up, buddy!

So head on over to Sugar Bee Crafts and learn how to make an Acorn Knot Hat so you can embarrass your children when they're teenagers too.

And leave some love while you're at it ;)

Wednesday, November 16, 2011

Drummer Shirt

Why is it that little girls are so much easier to make clothes for? There are so many cute little skirts, dresses, and ruffled tops out there for girls, but it seems like boys are limited to t-shirts and track pants. Boooooring!

My husband swears by his baseball tees. No matter how hard I try, I cannot get that man to wear a graphic tee. He doesn't like how the graphics look on it because he thinks they make him look "metro," and my guy is a guy who is all about "manly" things like super heroes, guns, and explosions.

Maybe I need to make him a shirt with an exploding super hero holding a gun. I mean, that's gotta be ultra-manly, right? Watch out world, I'm about to revolutionize fashion with my new line of men's clothing featuring exploding super heroes.

A friend of mine has a son who just turned 3 recently so while the idea of a shirt with an exploding super hero was appealing, I stuck to something more appropriate for a 3-year-old. This kid loves playing drums, so I decided to make him a fun shirt with something to do with drums. This is what I came up with: 


I got a Garanimals shirt from Wal-Mart, and used felt to cut out the letters and drum sticks. I love using felt on shirts so much because it's easy to cut and it doesn't fray. Plus, it gives a fun dimensional aspect to the shirt. After cutting the letters out, I just basted the felt onto the shirt with some basting spray (found that at Wal-Mart too) and sewed everything on with black thread.


If anyone is interested in a more detailed tutorial just let me know and I'll put something together. I think this shirt would be really cute with an electric guitar and maybe some lightning bolts or stars on it - because lightning bolts are also very manly. According to my husband, stars are NOT manly. Tell that to Captain America.


Check out my sidebar to see where I link up each week!

Friday, November 11, 2011

Fall Button Tree Shirt

In case you missed my guest post on Tatertots & Jello on the 2nd, here's what I shared! Also, make sure you check back next week...I have a giveaway for all of my awesome readers!

Today, I wanted to share a project with you inspired by my favorite season - fall! This fall button tree shirt is a really easy sew, perfect for beginners. You just have to have lots of patience to sit and hand sew all the button "leaves" on.


Here's what you need:
  • Download my free tree pattern HERE
  • A shirt
  •  Brown fabric for the tree
  • Sewable interfacing, like Heat 'N Bond Lite
  • Lots of buttons in fall colors
  • Basic sewing supplies

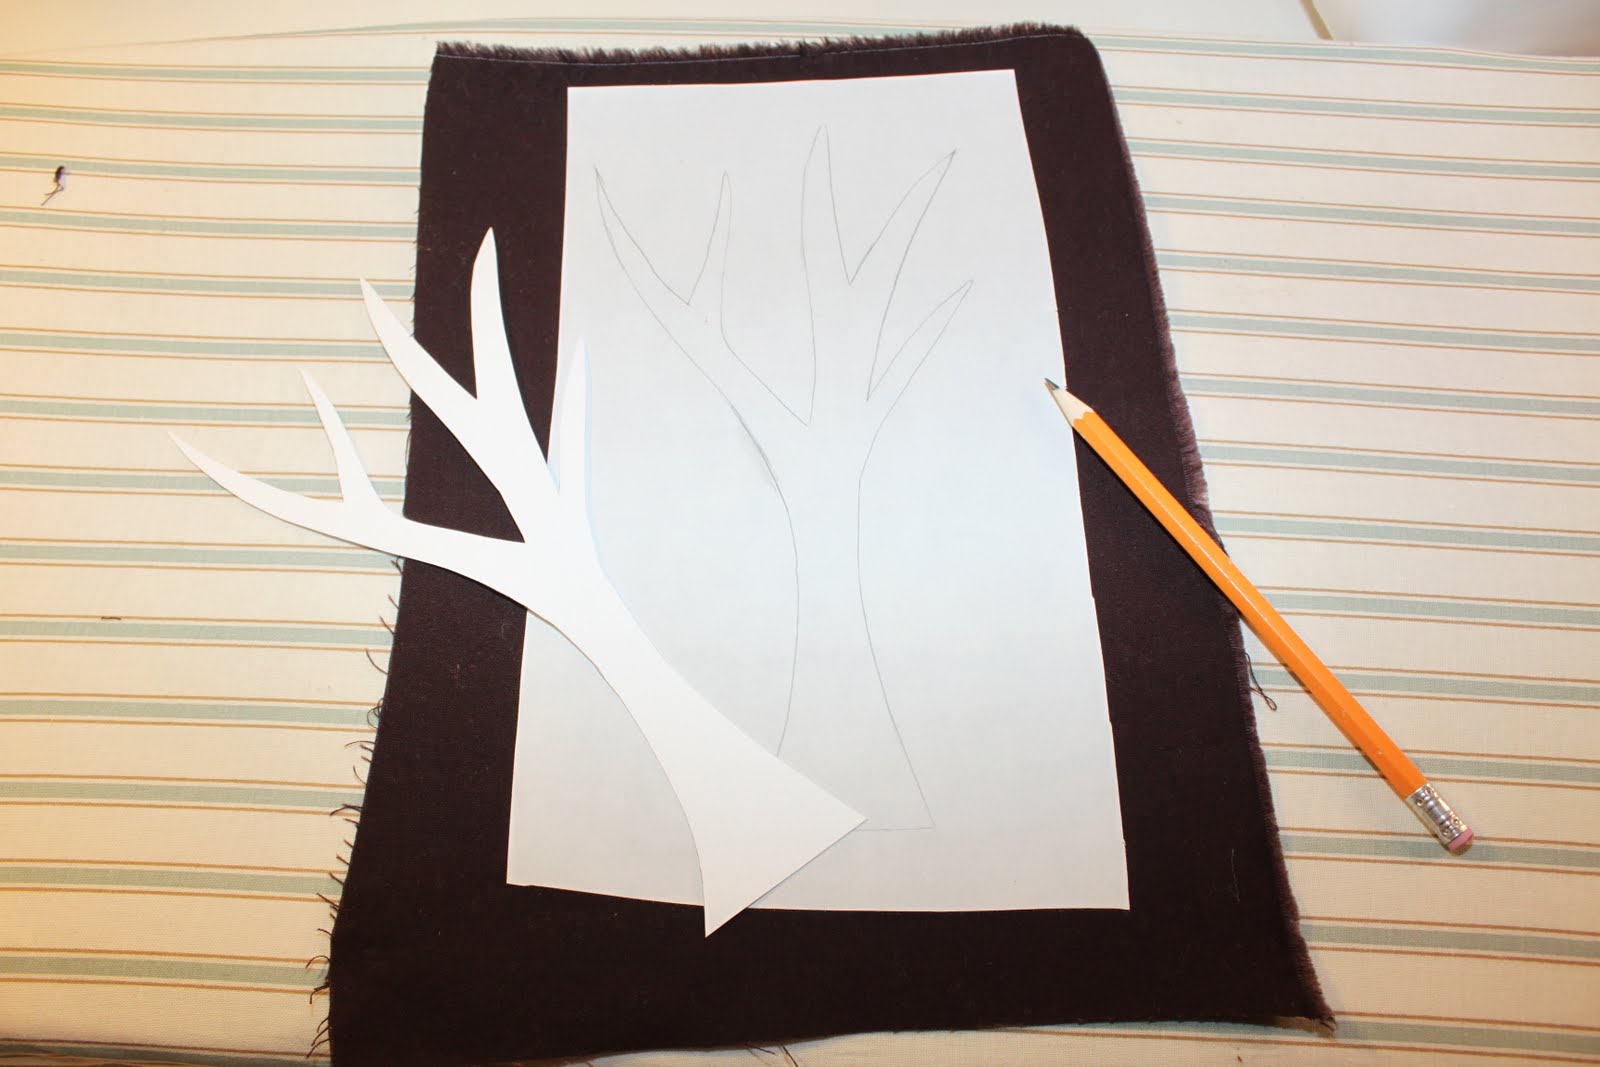
First, follow the directions on your interfacing to iron a piece of sewable interfacing larger than your tree image to the back of your fabric. Don't peel the paper backing off yet.


After your interfacing is ironed on, print and cut out my tree template, then trace it onto the paper backing of the interfacing.


Cut out your tree and remove the paper backing.


Using a hot iron, iron your tree onto your shirt following the interfacing instructions. Sew around the perimeter of your tree to secure (use stabilizer if needed, knits can be tricky sometimes.)


Now is where the patience part comes in! Dig into your button stash for some fall-colored buttons. Using a needle and thread, hand sew buttons around your tree until you're satisfied with how it looks. You might want to grab a snack and put on some of your DVR'd TV shows for the next hour or so while you're at it.


After lots of hand sewing, you should have a cute new fall shirt for your little one!


Now go find a big pile of leaves to jump in!


Check out my sidebar to see where I link up each week!

Sunday, November 6, 2011

Guest posting on The Dating Divas

I hope everyone is having a fantastic weekend! I just wanted to pop in and tell you that I guest posted on The Dating Divas yesterday and shared my tutorial for the Necklace Tee! Sorry for the late notice :)


The Necklace Tee was actually one of the first projects I did when I really started to get into craft blogging more. I had seen these kind of shirts for adults and thought, "Hey, I could totally do that!" Those kind of projects are my favorite kind! They're the ones where you can grab a handful of supplies that you already have on hand, sit down for half an hour, and whip out an awesome project. It's even no-sew - well almost, just a little hand sewing for the ribbon bows. 

So come check me out at The Dating Divas and say hi! And while you're there, check out all the great dates the Divas have put together to bring you and your better half closer together.

Thursday, November 3, 2011

Guest posting at Tatertots & Jello!

I can't believe I'm saying this, but I'm guest posting over at Tatertots and Jello today!!

I whipped up something a little fall-ish to celebrate my favorite season - and as an added bonus, I actually got to use up some of my button hoard.


Can we all take a moment of silence in honor of the fact that I actually got a holiday-themed project up before the actual holiday is a week from being over? And can we all just pretend for a moment that fall is actually a holiday?

Awesome, glad we got that all straightened out.


So anyway, head on over to Tatertots and Jello and check out my Fall Button Tree Shirt tutorial. And while you're at it, show some love! Because all you need is love. But comments are nice too :)

Wednesday, October 26, 2011

Monster Hoodie Refashion: Guest Post with Maybe Matilda

It's an understatement to say that I'm pretty psyched to have Rachel with Maybe Matilda guest posting today. I've always loved her blog because she's funny, honest, and she works magic with crochet hooks. And as someone who can only crochet things that are square or rectangular, that pretty much makes her a superhero in my book. But crocheting is only a part of what Rachel does. I'll let her tell you a little more about herself.

---------------------------------

Hi! I'm Rachel and I blog at Maybe Matilda about crochet, sewing, and clothing refashions. Now, right off the bat, I'm going to warn you: I'm not one of those ladies. You know the kind, with their houses all decked out weeks in advance of every holiday, thoughtful handmade gifts to give, and clean, well-behaved children wearing home-sewn clothes (probably sewn from home-spun fabric, too). 

So I'm going to lay it all out right now: this is the only semi-Halloween-ish item in my home right now. And it's one of the only clothing items I've ever made for my little boy. And I purposely didn't make it too Halloween-ish, because I didn't want it to be limited to wear for the next week or so, so it hardly even counts as a holiday item. And, to top it off, it's dirty in the pictures (which, of course, are fuzzy). Gimme a break--he's a real boy and his clothes stay clean for all of about 20 seconds. If you're still interested and not completely turned off by my lack of mothering superpowers, maybe you'll enjoy this sneaky peeky monster hoodie refashion I pulled together for my little fella:

I have to admit, I think it's pretty cute! I bought him that hoodie a few weeks ago for a few dollars, but he already has a few plain hoodies and I thought maybe he could use one with more character. I reverse appliqued these cute little monster heads onto it, and wild guess here, but I think he might like it!

Here's how I refashioned his little hoodie with some peekaboo monster fun!

You'll just need:
- a hoodie
- knit/jersey fabric scraps
- sewing machine
- hot glue/fabritac
- googly eyes
- felt

I started by sketching and cutting out the monster heads on white paper. I thought it would be cute to have them "peekabooing," if I can make up that word right now, into the sweatshirt, so I drew one popping up out of the pocket and another poking out from the zipper.

Make sure your fabric scraps are a bit larger than the designs you sketched, and pin everything together. The layering, from top to bottom, should be paper, hoodie, fabric scrap.

Now sew around the shape of the pattern sketches--you're not sewing onto the paper, but using it as a shape/guide to sew around. Make sure you're sewing through both the hoodie and the fabric scrap behind it. Try not to stretch the fabric as you sew, and if you get to points or curves that are hard to navigate, just stop sewing while the needle is down in the fabric, lift up the presser foot, and swivel your fabric, then lower the foot and keep sewing. When you're finished, remove the pins and you should have a nice stitched outline of your sketch:

Here's what it'll look like from the back:

I sewed straight over a fabric fold by accident . . . whoops! No biggie--it's in the back, so I just left it. (Perfectionist? Not even a little. I can thank my mother for that--we've jokingly nicknamed her Kathleen "Goodenough" LastName.)

Now trim away the excess fabric from the back, being very careful not to accidentally cut the hoodie fabric.

This is the part that made my heart race. It's a little scary, so be cautious. Carefully, carefully, cut out the monster shape from the hoodie fabric. Make sure you're staying inside the stitching lines, and be very careful not to cut the scrap fabric from the back! It's easiest, I find, to pull the two fabrics apart as much as you can, and use small sharp scissors to start with a little snip in the center of the design:

Then work from there to cut the rest of the fabric away, without getting too close to your stitch line.

Add some googly eyes and teeth cut from a bit of felt, and you're all done! (I used hot glue to attach the googly eyes and felt, and time will tell if that was a poor decision or not. I'm sure something like Fabritac would hold up better in the washer and dryer, so it's possible that my son's hoodie is going to lose its facial features after the first wash. I'll put an update on my blog after it's been washed.)


Thanks for inviting me to write a guest post, Jen, and I hope you guys will come visit me at Maybe Matilda!

 ---------------------------------

Isn't he such a cutie? I just love a little guy in monster gear. Thanks for sharing, Rachel! Make sure you go visit Maybe Matilda and check out her other great tutorials and projects!

Friday, September 30, 2011

My end-of-season steals

Nothing else gets me like having to pay $30 for teeny baby jeans that they'll grow out of in a month. I mean, babies are like 1/6 the size of a normal person, so lets take that price and divide it by 6. I'd happily pay $5 for baby jeans. Sadly, I don't think retailers will ever agree with me. And that's why I love end-of-season sales so much.

If you've been reading for awhile, you know that I hate paying full-price for stuff, especially clothing, which is probably why I love making clothes for my kids so much. When I go shopping, I usually walk in and make a bee line for the clearance rack. When it comes to clothes for myself, I have an awesome sister-in-law who dresses me, so she's just helping to enable my cheapness even more. And I love her for that. And don't even get me started on my husband. The man would be happy to own a pair of cargo shorts and 2 baseball tees, one in black and one in gray.

So back to baby clothes. At the end of each summer and winter, the hubs and I make a trip to some stores and stock up ahead of time for the coming seasons, which helps us get a lot of cute clothes for the kids at prices we would never be able to get in season. We happened to be in Babies R Us recently to find a new car seat for Connor, and they had an amazing clearance event that I couldn't pass up. Everything was discounted already with an additional discount on top of it PLUS a buy one get one free deal.

It was on.

Here are some of the cute things we scored for next year:


A bunch of cute matching graphic tees and comfy shorts,


(I just love the blue striped shirt for some reason, the color is so pretty! ...I mean manly.)


And of course, I had to get a pair of swim trunks for Connor for next summer. He's going to look like such a big kid :(


For Haley, I found this adorable ruffle skirt,


Jean shorts for $3!


And assorted other pants and shirts. But my favorite had to be these:


Adorable rainbow sneakers! Love love love. They match everything, so that's a major plus :)

Is anyone else an end-of-season shopaholic like me?

LinkWithin

Related Posts with Thumbnails