Showing posts with label inexpensive. Show all posts

Tuesday, April 3, 2012

Shirred top to dress {clothing refashion}


I have this shirt that I can't bring myself to part with. I've had it for about 5+ years now, and I've always hung onto it because I love the embroidery detailing on it, and more importantly, I had my engagement pictures taken in it.

Aw, look at young, blonde me!


Unfortunately in this case, I am a skinny girl and that carries over to my *ahem* bust area. The shirring on the top of the shirt is pretty, but I can't manage to keep it up very well :) I didn't want to throw the shirt away though, it just looked too pretty and carried too many memories, so I refashioned it into a dress for Haley. It's cool to think I wore the shirt over 5 years ago when my daughter was just a dream, and now she's running around playing in it. What a great way to repurpose a piece of cherished clothing!


Supplies:
  • Shirred top
  • Disappearing ink marker
  • Double fold bias tape
  • Scissors
  • Sewing machine and basic sewing supplies

Step 1: Size your shirt. 

Here's the shirt I started with. I put it on my daughter to figure out how much I needed to take off the sides.


I simply turned the top inside out and pinned down both sides. Then, I used my disappearing ink marker to mark the areas that I would be trimming off. Using a zig-zag stitch, I sewed along the sides of my dress on the lines I drew and cut off the excess fabric.


Step 2: Make your straps.

Next, measure your child over the shoulders to determine how long your straps would be and add 1/2 inch. For my 3-year-old, my straps were each BLANK.

Position your bias tape on the inside of your dress and stitch down using 2 separate rows of stitches. Repeat to attach the straps to the back of your dress. I decided to cross the straps so they would make an 'X' in the back.


To add more visual interest to the dress, I made an inverted box pleat


And that's how an old, loved shirt became a new dress for my daughter :)


Check out my sidebar to see where I link up each week!

Thursday, March 1, 2012

Spring Flowers Shirt


Spring has come early this year it seems! I'm not complaining. Spring and fall are my favorite seasons. There's something so refreshing about walking outside with the smell of rain in the air and budding flowers everywhere. In fact, we haven't gotten ANY snow yet in my part of Tennessee. My husband, who comes from PA, is not happy about this fact - but I'm pretty darn thrilled with the mild weather. It means more play time outside for the kids, and more outdoor running for me :)

I made this shirt for my daughter as a way to welcome in the pretty spring flowers. The flowers are made using organza and seed beads then hand-sewed to the shirt, so no sewing machine needed - yay! You can find lots of pretty colors of organza at your local fabric store too, so the color combinations are endless.

Supplies:
  • Shirt
  • 1/4 yard organza
  • Fray Check (to keep the edges of your organza from fraying)
  • Seed beads
  • Needle and thread

Step 1: Make your organza flowers.

First, start by folding a square of organza in half and cutting a little petal shape out (don't cut the fold!)


When you open your petal, it should look like this. Repeat this process to get 6-8 petals per flower. Apply your Fray Check to the edges of your petals and let them dry according to the bottle's instructions.


After all of your petals are cut out, stack them on top of each other (keeping them folded) and fan them out into a flower shape.


Pinch your flower in half and, with your threaded needle, sew through the bottom of your flower. Unfold your flower and pinch it in a different direction and repeat the same process 2 more times. Knot your thread and clip.


You should now have a flower that looks like this! Repeat this process for however many flowers you want. I suggest making at least 3.


Step 2: Stitch your flowers to your shirt.

Now to attach your flower to your shirt. Hand sew your flowers to your shirt with your needle and thread by sewing through the middle of your flower with coordinating thread. On your third stitch, before threading your needle back down through your shirt, add 3 seed beads for the center.


And there you have it, a pretty new spring top!


When laundering your shirt, lay it flat to dry so your flowers aren't crushed and deformed by the dryer. While they're wet, press the flowers open with your fingers some to help keep their shape.

Check out my sidebar to see where I link up each week!

Wednesday, February 22, 2012

Chevron jewelry organizer


My jewelry situation is a sad mess. All of my necklaces are tangled in one giant knot (both from being clumped together and from little hands playing with them). I've been keeping all of my jewelry in an old, standing jewelry case in my bedroom, and I'm tired of looking at that big, clunky thing in the corner of my room everyday. I wanted to make something that would keep all of my jewelry organized, but look cute at the same time. Can you guess what I used?

A bulletin board! (OK, maybe it wasn't that difficult to guess...)


I originally wanted to buy a bunch of mismatched drawer pulls and drill them into my wall, but when I found this bulletin board for $6, I immediately knew what I wanted to do

To make your own chevron jewelry holder, here's what you need:

Supplies:
  • Bulletin Board
  • Spray paint or acrylic paint - 2 colors
  • Clear sealant
  • Foam brush
  • Nails
  • Double fold bias tape
  • Vinyl or contact paper for the stencil
  • Masking tape

Step 1: Paint your bulletin board.

First, you'll need to paint your bulletin board white. It may take a few coats to cover it completely, but make sure you have good coverage, especially over the wood frame. You'll want to paint the cork board too. Spray paint would probably be best, but it was night time and I was impatient, so I used acrylic paint instead.


Step 2: Apply your stencil.

Now, you'll need to apply your chevron stencil. I used my Silhouette to cut out a chevron design and apply it to my board, but if you don't have a craft cutter, just Google "chevron" images and then trace the pattern onto the paper backing of your contact paper, cut out, and stick to your bulletin board.


Step 3: Apply your second color. 

Next, put tape around the wooden edges of your bulletin board, right up to the cork so that when you apply your other color of paint, none gets on the wood border. Apply your second coat of paint and let dry. You will probably need several coats of your second color as well.
 

After your paint has dried, peel off your masking tape. As you can tell from my picture below, some of my turquoise paint leaked into my white areas. I just took a small brush and touched everything up until it looked good.


Here's what it should look like when you finish painting!


Step 4: Add nails and bias tape to hold your jewelry.

Finally, I used a ruler to evenly space my nails. I simply used a hammer to gently hammer them in without pushing them completely through the cork. From there, I just hang my necklaces on the nails.

To hold my earrings and bracelets, I folded the ends of a piece of bais tape under and hot glued them. I then placed the looped ends over a couple of nails, that's it! The earrings I just hook onto the bias tape and for the bracelets, I string them onto the bias tape and when I want one, I just take slip the end off the nail and choose the one I want.


This project turned out better than I could have hoped. I'm so glad to have a functional, pretty new jewelry organizer.


I won't even pretend that this is half of my jewelry. I might need to make myself a couple of these...

Check out my sidebar to see where I link up each week!

Monday, December 19, 2011

Easy DIY gifts for the holidays

Need some ideas for a few last minute (and inexpensive) handmade gifts that you can whip up this weekend? Here are a few of my favorites from around blogland:


 Flower hairpins at Craftstylish


Cute and easy headband (made from a sleeve!) at Maybe Matilda


Honey almond oatmeal soap bars from Just Deanna


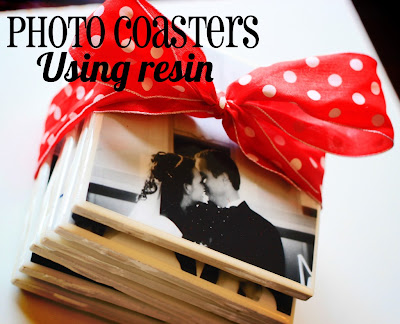
Photo tile coasters from Oopsey Daisy


Ball jar sewing kit at Frugalicious Me


Bubble magnets at My Own Road


Magnetic paper dolls at Make it and Love it

For even more ideas, check out my board full of gift ideas and giftwrap on Pinterest. You can also see all of my boards and follow me HERE.

Happy (handmade) Holidays!

LinkWithin

Related Posts with Thumbnails