Tabs

Friday, September 30, 2011

My end-of-season steals

Nothing else gets me like having to pay $30 for teeny baby jeans that they'll grow out of in a month. I mean, babies are like 1/6 the size of a normal person, so lets take that price and divide it by 6. I'd happily pay $5 for baby jeans. Sadly, I don't think retailers will ever agree with me. And that's why I love end-of-season sales so much.

If you've been reading for awhile, you know that I hate paying full-price for stuff, especially clothing, which is probably why I love making clothes for my kids so much. When I go shopping, I usually walk in and make a bee line for the clearance rack. When it comes to clothes for myself, I have an awesome sister-in-law who dresses me, so she's just helping to enable my cheapness even more. And I love her for that. And don't even get me started on my husband. The man would be happy to own a pair of cargo shorts and 2 baseball tees, one in black and one in gray.

So back to baby clothes. At the end of each summer and winter, the hubs and I make a trip to some stores and stock up ahead of time for the coming seasons, which helps us get a lot of cute clothes for the kids at prices we would never be able to get in season. We happened to be in Babies R Us recently to find a new car seat for Connor, and they had an amazing clearance event that I couldn't pass up. Everything was discounted already with an additional discount on top of it PLUS a buy one get one free deal.

It was on.

Here are some of the cute things we scored for next year:


A bunch of cute matching graphic tees and comfy shorts,


(I just love the blue striped shirt for some reason, the color is so pretty! ...I mean manly.)


And of course, I had to get a pair of swim trunks for Connor for next summer. He's going to look like such a big kid :(


For Haley, I found this adorable ruffle skirt,


Jean shorts for $3!


And assorted other pants and shirts. But my favorite had to be these:


Adorable rainbow sneakers! Love love love. They match everything, so that's a major plus :)

Is anyone else an end-of-season shopaholic like me?

Tuesday, September 27, 2011

Guess who's mobile?

Yup, this little guy here is finally crawling.


It took him about 9 1/2 months, but Connor is officially crawling EVERYwhere. He's been rocking back and forth for awhile now, but he finally got enough coordination to go for it. And I couldn't be happier. Most of the time, he sits and plays well but then gets bored and cries for us to carry him somewhere new. Now, he just goes places himself.

He's still a little tipsy, but that makes him even more adorable. Watching him crawl in these early stages is hilarious. He looks like a little bulldog when he's crawling at you with a concentrated look and short, quick steps.

Life is just more interesting when you can go places yourself.


And now that means Connor finds wires to chew on. And random pieces of stuff on the floor end up in his mouth. And books get torn up. I'm going to have to hide everything. Again.


But I can't be mad at this face, can I?


Sunday, September 25, 2011

Mystery project reveal and a winner!

Many of you made some good guesses on the blog as to what I've been up to lately, and if you follow me on Facebook I threw out some hints about what I was working on. I think I'm pretty terrible at hinting. That's probably why I only made it through 3 hints before someone got it. I'm also really bad at lying which I suppose isn't a bad thing unless your 4 years old and your dad tells you that he got your mom towels for her birthday and to keep it a secret. I'm sure you can guess how that one turned out. I kept that secret for a whole 15 minutes.

So the oh-so-secret mystery project is bibs! Not just any bibs though, fruit bibs! Why? Because fruit-themed anything is awesome. Remember the California Raisins? Exactly.


I'm participating in my first craft show this week, so I whipped up about 25 of these babies to sell at the show. I think my hands are permanently cramped in a claw-like position from all the sewing I've done recently. I really love how they turned out though, too bad my 2 1/2-year-old doesn't like things tied around her neck and my (almost) 1-year-old has started to pull a Hulk move and rip bibs off his neck with excessive force lately. Sigh.


They really turned out better than I hoped though. They get me in a very fall-ish mood, which is my favorite season next to spring by the way. I think I'd be ok if we did away with summer and shortened winter some, or at least required winter to stay above 50 degree temperatures and snow on command on days when I felt like seeing all the pretty snow. Not to much to ask, right?

They were inspired by a shirt I made, similar to the apple bib above, for a friend 3 years ago when I first started sewing. I then saw this pin on Pinterest and thought, why not combine the two ideas? I'm calling them Fruit Basket Bibs, and the fruits include an apple, pear, strawberry, and orange. I think the orange is my favorite, even though it took a lot of patience to stitch each individual fruit section on. Times 8.


You all made a lot of great guesses that came close, but Rebecca made the right guess on the Facebook page.


Congrats, Rebecca! You will be getting your very own orange bib in the mail very soon! The craft festival is this coming Friday, and I've never done anything like it, so wish me luck!

I'm linking up to the parties on my sidebar, as well as the Point of View Autumn Link Party and The CSI Project:

Visit thecsiproject.comPoint of View: A Creative Collaboration,a creative collaboration,point of view,point of view a creative collaboration

Thursday, September 22, 2011

Preparing for Baby

Not me, thank you very much. Not yet anyway, I'm having enough fun juggling two right now to think about a third just yet!

Has anyone else noticed that everyone seems to be pregnant or having babies lately? Dana over at MADE just announced that she's pregnant with another little girl on Tuesday - so excited about all the adorable baby projects that are sure to follow! And of course Katy over at No Big Dill just had her 6th child - a little boy! I can't wait to see all the fun boy stuff. I imagine that making boy things after having 5 little girls to sew for must be exciting and intimidating. Then there's Rubyellen over at Cakies who just had her 4th little girl. There's something in the water...and I'm not ready to drink that Kool Aid quite so soon after the last one.

But, if you are pregnant, or you have a friend that is, The Dating Divas have some great ideas on how to prepare for baby. They included some great ideas for essentials like preparing your husband, getting maternity pictures taken, getting your other little ones ready for the new baby, and of course making time for yourself - something that we ladies forget to do!

And you might even see my Hospital Survival Kit for New Mothers over there as part of the roundup :)


Go check out all the fantastic ideas to prepare for a new little one over at The Dating Divas. And in just a few weeks, I'll be blog swapping with them - so excited!

PS - have you taken a guess at what I've been up to lately to win a mystery prize? If you're a follower on Facebook, I've been giving little hints along the way :)

Wednesday, September 21, 2011

I've been busy

 *This giveaway is now closed*

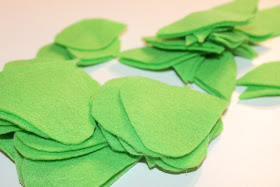
Sorry I haven't posted a project yet this week, my craft room has been looking more and more like an assembly line lately. I've been cutting so much, I have a blister on one of my fingers from where the scissors rubbed it raw.


I've been doing LOTS of tracing, cutting, ironing, and sewing.


Just when I think I'm done, there's still more to do.


Can you guess what I'm up to?


There might be something in it for the first person who guesses right... :)

Monday, September 19, 2011

My new flash!

So this came in the mail recently....


My brand spankin new Canon Speedlite 430EX II!

I have been so bummed about some of the pictures I've been taking lately. I so wish I had the ability to stay at home with my babies and craft during the day like many of you other lucky ladies out there. If so, I would be able to craft during the day and take pictures then when the lighting is perfect. Right now, I need to work to help bring home the bacon, so the majority of my crafting is done at night - which makes for over exposed, often yellow pictures.

It's really a huge let down when I work so hard on projects and then staging them just so, and then they turn out yellow due to poor lighting. But not anymore now that I have this baby! My husband spoils me. I won't even list the many things we've purchased for me this year. Let's just say I won't be getting any Christmas, birthday, or anniversary gifts for the next few years. And I'm totally cool with that.


I still need to read the instruction book to really get the hang of the new flash, but I'm already loving it in auto mode. I played around with the flash some to see how big of a difference it really made with my pictures (please ignore the messy craft room!)


1. Without flash

2. With standard flash that came with my Canon Rebel


3. Speedlite pointed directly at me

3. With retractable wide panel down


4. Speedlite at a 75 degree angle

I can already see a HUGE difference with my Speedlite. It lightens up the shadows and makes all my pictures look much more natural. Plus, since the flash is adjustable, I can use it to bounce light off the ceiling and walls for better pictures. I'm SO excited to start using it with all my projects in the evening. No more over exposed pictures that I spend forever editing. I'm one happy girl!

Wednesday, September 14, 2011

Scrappy Flower Headband: guest post with Nature's Heirloom

Hello MOR readers!! I'm so excited to be visiting Jen's blog today! My name's Nikki and I have a little blog called Nature's Heirloom where I like to share my musings, whatever they may be that day or week.

I LOVE sewing things for my little girl, especially when it's a hair accessory. Yep, I'm an accessory-aholic. So I'm going to share with you one of my favorites, a scrappy flower headband. Not only are they adorable, but they also help you used up scraps, AND they're super easy to whip together. Plus, I can use these for her, or for myself. BONUS!


All you need is some scraps of 3 different fabrics. One needing to be at least 29 inches long and 2 1/2 inches wide. Also, a sewing machine would definitely be helpful, and scissors.

Start by folding your long piece of fabric in half, width wise. Cut from the fold to the ends, tapering down as you go. The fat end should be around 2 1/2 inches wide.


Next, either serge the edges, or if you don't have a serger, leave the edges raw and sew a straight line 1/4 inch around the edges. Over time, the edges will fray a bit, giving the headband a different, but equally as cute look.

Next, cut a couple strips of your fabric for the flower about 1 inch wide. How long you will need them will depend on how big you want your flower, and how "tight" the flower will be pleated. So the length is up to you. But more is always better to start out with. Also, cut a couple leaf shapes of your third fabric.


Lay one "leaf" off to one side of the headband. Sew around the edges about 1/4 inch in.


Lay the next "leaf" down where you want and sew.


Now, take one strip of fabric and pleat it a couple times so it fans out (pleates being tighter on the bottom, more loose on the top). Press with the iron.


Add a few more pleates. Press again.


Repeat until the strip is completely pleated.


Start laying out your flower, making a large circle.

Once you make a full circle, sew it down.


Circle the rest around and pin in place.


Sew it down. You can do a cirlce, but I like to do a triangle.
I'm not sure why.

Now, you can either finish it off with a button in the center, which I do often, or you can do a fabric center, which I will now show you.


Take a short strip of the fabric and pleat it to make a "mini pleated flower".


Place that in the center and sew down.


And you're done! It only takes a few minutes, and you can whip out a whole bunch of them in one sitting!
You can also do different variations, like instead of one big flower, you make smaller versions of the pleated flower, and group them in threes. You can see a bunch of my variations on my post HERE. These will fit a child or an adult.

I hope you enjoyed the tutorial! If you make any, feel free to add them to my flickr group HERE! I'd love to see them!!

Thank you Jen for letting me visit your corner of the blogging world!!!!

------------------------------------------------------


Thanks for the awesome tutorial Nikki!

Make sure you go visit Nikki over at Nature's Heirloom and check out all of her great projects that she somehow finds time for in between caring for her 3 kids.

Some of my favorites are her Simple Burp Cloths, Little Man Toolbelt, and Fall Pom Pom Wreath.

Monday, September 12, 2011

When life hands you lemons, make a brand new shirt.

Are you one of those people who makes perfect projects every time? Like, all you have to do is just envision your project, carry it out, and it comes out perfect, just how you imagined? If you are, I am extremely envious of you. I am not one of those people.

Most of the time I come up with a project, tweak it. Tweak it again. Do the project. Realize something is off. Tweak it again. Finish it, then when analyze the crap out of it and see only the flaws.

If you're on Pinterest, you've probably already seen this picture, but it makes me laugh every time because I feel this way during a lot of projects:


I'm definitely harder on myself than anyone else, and a lot of the time it's just be being a perfectionist. Other times however, it seems the craft gods are against me.
This weekend, I got it in my head to make a cute football-themed shirt for my daughter to show her support for the Steelers. I found this adorable idea for a shirt on Pinterest for a shirt with a football helmet appliqued on it and a bow on the helmet - you know, show some support for your favorite team but with a girly twist. I was psyched. Since I had a lot of fabric leftover from making my son's Steeler's-themed bedding, I decided to use that fabric to make a shirt for my daughter.

I got all excited about making the shirt and was even going to do a tutorial, then everything started going wrong from the beginning. I couldn't get the Steelers logo to fit right into my helmet template and had to cut it 4 different times, then I was finally able to cut it out and iron it on my shirt.


I began using a satin stitch around the edges, and about 5 seconds in my machine caught the shirt fabric in the feed dogs. After prying the shirt mentally cursing out the innocent shirt (because that's a lot more sane than outright yelling at an article of clothing), I moved the applique and started again. Halfway through, my machine caught the shirt in the feed dogs again.


I don't know if you can see it well in the picture below, but it's the spot with the tangled mass of thread near the top of the mask.

When it happened, I cycled through the stages of grief.


Shock and denial: "Oh no!! Not again! I can't believe this happened a second time! Wait, it's Ok. It's barely noticeable. Except when I stick my entire finger through the hole..."

Anger: "Argh, stupid sewing machine, why did you have to eat my shirt! See if I ever oil you again...that'll show you..."

Depression: "Now I'm going to have to start all over. I might as well just throw the shirt away."


Dialogue and Bargaining: "Please just make this thing work, I don't want to have to start all over again! I've already lost 5 hours of my life!"

Acceptance: "...crap."


There was no way of ripping the original design out without making even MORE holes, so I decided to whip out my felt and cover the whole applique.


I still kept with the whole "girly football" theme, but with a football instead of a helmet. Not what I was originally shooting for, but I was about done with the shirt at this point. I was planning on doing a tutorial, but by the time I finished the shirt, I had run out of sanity.

So here it is. A football shirt for my daughter that took about 6 hours.

She will be wearing it until she's 16.

Check out my sidebar to see where I link up each week!