I have a bad history with keeping flowers alive.
I had a garden last year, but those poor flowers didn't stand a chance. I didn't have the stamina to sit out in the 90 degree Tennessee heat and pull weeds from a bed full of plants that weren't going to give anything back to me other than a few months of visual enjoyment. I can't eat them. I can't sell them. They're pretty, but if I pick a few to display inside, they die within days.
What's the point??
My flower garden became a sad little bed of wilted flowers and weeds by the end of the summer. I think I'll stick to the fake flowers, thanks!
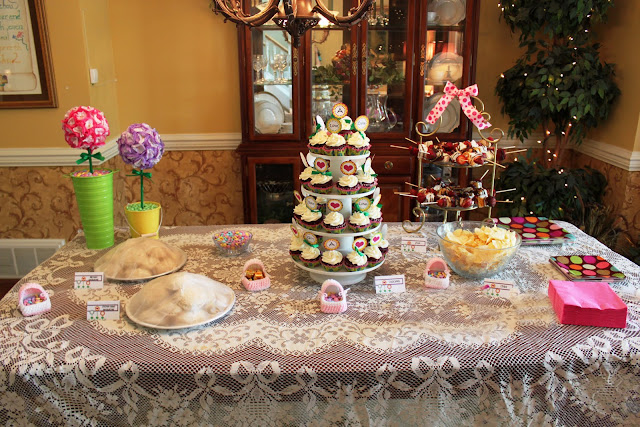
I made these cute topiaries for a friend's Flowers and Dots baby shower recently, but they make a great spring decoration or Mother's Day gift as well.
Supplies:
- 3 wooden skewers
- Glue gun
- Green ribbon
- 2 colors of issue paper - 1 for the flowers, and 1 for the center
- Floral foam ball
- Yellow quilting pins
- Something to display your topiary in (small bucket, vase, etc.)
- (optional) floral foam squares
Step 1: Glue your skewers to make the stem.
Line up 2 skewers with the points and bottoms facing the same direction. Using a glue gun, put a dab of glue on the side of one skewer close to the bottom. Attach the second skewer. Dab a little more glue on the opposite end of the skewer to glue the other ends of the skewers together. Attach the 3rd skewer in the same way. You will now have a little cluster of skewers for the stem.
Step 2: Wrap your stem in ribbon.
Next, take your ribbon and hot glue the end of the ribbon to the side of your skewer cluster near the bottom of the cluster with the flat ends. Tightly wrap your ribbon all the way around your cluster until you are within an inch of the top. Cut your ribbon and attach the end of the ribbon to the side of your cluster with more hot glue.
Step 3: Cut out your circles.
Now, find some kind of template to trace circles on your tissue paper. I used a toy teacup that belongs to my daughter. Fold the tissue paper you want to use for your flowers several times to get the most circles when you cut. Use your template object and trace lots of circles on top. Cut out. Repeat to get lots of circles! You'll be making your flowers by stacking 3 of these circles on top of each other, so you'll need a bunch.
Make the center for your flowers with this same method. You will only need one circle for the center of each of your flowers, so you don't need to cut as many of these.
Step 4: Make your flowers.
Place 3 of the circles you cut for your flowers on top of each other. Place one of the circles you cut for the center on top of your stack. Scrunch your circles to make a flower. Position your flower on the floral foam ball, and insert a quilting pin through the middle of your flower into the ball. Repeat around the entire surface of the foam ball.
When you finish, your ball should look like this:
Step 5: Insert the stem.
Now, pick a spot where you want your stem to go and push aside a couple of your flowers to uncover the foam ball. Push the pointed edges of your stem into your foam ball.
Now use the same ribbon you used to wrap the stem and tie a small bow around your stem near the top. Insert the bottom of your finished topiary into a square of the floral foam and insert into your chosen display, in my case some small buckets. You can add fake moss, fake grass, marbles, whatever you want in the bottom!
Now you have a cute spring topiary that won't die. It's the perfect plant.
Linking up here:
 |  |  | |||
 |  |  |  |  | |
 |  |  | |||
 |  |  |  | ||
 |  |  |  |
 | Show and Tell Wednesday at Blue Cricket Design |


