Tabs

Wednesday, February 29, 2012

Make it rain....marshmallows


Hi, my name is Connor McCaffrey and I'm addicted to marshmallows.

I blame my husband. Not for the mess, but for what caused the mess: the marshmallow addiction. I can't remember the first day that Patrick gave Connor a mini marshmallow, but from that day forward the boy has had a blood lust for them. He can be in a horrible mood and all he has to see is that bag of Jet-Puffed marshmallows, his drug of choice, and his little face lights up. It's cute really, but not when your floor is covered in marshmallows.

We have a pantry door that had the baby lock broken on it from 3 years of Haley's little fingers attempting to pry it open. Eventually the little plastic lock gave up on life, and we've never bothered to replace it. Enter Connor and his addiction.

Patrick and I recently had a particularly eventful evening with whiny children last week, and we had just sat down to our dinner while the kids played. We heard rustling by the pantry door and knew immediately that Connor had found the bag of marshmallows. Knowing that the bag had a clip on it, we decided to give ourselves another minute to chew until one of us would have to pry the bag out of his little fingers. One minute was all he needed.

As Patrick walked over to Connor, what he saw was a very pleased little boy in the midst of a mini marshmallow feast. Rather than waiting for us to give him a couple marshmallows, Connor had taken matters into his own hands and shaken the contents around the kitchen. If he could talk in full sentences, I imagine him yelling, "Make it rain!" while scattering the contents of the bag around the kitchen.

And unfortunately for Connor, the 5 second rule did not apply to these marshmallows. He had to go several days without his fix until we could buy a new bag. And that new bag now resides in the pantry on lock down.

Friday, February 24, 2012

Push Pack giveaway winner

 
Wow, what a great response to the Push Pack giveaway!! It seems like a lot of mama's out there could use a bag of essentials to have on hand when they have their little ones. Thanks for all of your feedback about which item was your favorite - many people said that the nipple cream was the one item they liked the most. I quickly learned about the need for nipple cream myself after I had baby #1, and you better believe I had a tube of that with me when I had my son!

I really wish I could give a Push Pack to each of you who entered (and I totally wish I had been given one of these myself when I had my kids!) but unfortunately, there has to be only one winner. After plugging all the entries into Random.org the winner is.............
#26, Knit & Purl Mama!

 Congrats!! An email has been sent to the winner. A big thanks to Laura for giving away one of her awesome Push Packs

Thank you also for all of my awesome readers, I appreciate each of you and the support you show for me and my little blog :) I have some more fun projects to share with you soon!

Wednesday, February 22, 2012

Chevron jewelry organizer


My jewelry situation is a sad mess. All of my necklaces are tangled in one giant knot (both from being clumped together and from little hands playing with them). I've been keeping all of my jewelry in an old, standing jewelry case in my bedroom, and I'm tired of looking at that big, clunky thing in the corner of my room everyday. I wanted to make something that would keep all of my jewelry organized, but look cute at the same time. Can you guess what I used?

A bulletin board! (OK, maybe it wasn't that difficult to guess...)


I originally wanted to buy a bunch of mismatched drawer pulls and drill them into my wall, but when I found this bulletin board for $6, I immediately knew what I wanted to do

To make your own chevron jewelry holder, here's what you need:

Supplies:
  • Bulletin Board
  • Spray paint or acrylic paint - 2 colors
  • Clear sealant
  • Foam brush
  • Nails
  • Double fold bias tape
  • Vinyl or contact paper for the stencil
  • Masking tape

Step 1: Paint your bulletin board.

First, you'll need to paint your bulletin board white. It may take a few coats to cover it completely, but make sure you have good coverage, especially over the wood frame. You'll want to paint the cork board too. Spray paint would probably be best, but it was night time and I was impatient, so I used acrylic paint instead.


Step 2: Apply your stencil.

Now, you'll need to apply your chevron stencil. I used my Silhouette to cut out a chevron design and apply it to my board, but if you don't have a craft cutter, just Google "chevron" images and then trace the pattern onto the paper backing of your contact paper, cut out, and stick to your bulletin board.


Step 3: Apply your second color. 

Next, put tape around the wooden edges of your bulletin board, right up to the cork so that when you apply your other color of paint, none gets on the wood border. Apply your second coat of paint and let dry. You will probably need several coats of your second color as well.
 

After your paint has dried, peel off your masking tape. As you can tell from my picture below, some of my turquoise paint leaked into my white areas. I just took a small brush and touched everything up until it looked good.


Here's what it should look like when you finish painting!


Step 4: Add nails and bias tape to hold your jewelry.

Finally, I used a ruler to evenly space my nails. I simply used a hammer to gently hammer them in without pushing them completely through the cork. From there, I just hang my necklaces on the nails.

To hold my earrings and bracelets, I folded the ends of a piece of bais tape under and hot glued them. I then placed the looped ends over a couple of nails, that's it! The earrings I just hook onto the bias tape and for the bracelets, I string them onto the bias tape and when I want one, I just take slip the end off the nail and choose the one I want.


This project turned out better than I could have hoped. I'm so glad to have a functional, pretty new jewelry organizer.


I won't even pretend that this is half of my jewelry. I might need to make myself a couple of these...

Check out my sidebar to see where I link up each week!

Monday, February 20, 2012

Push Pack Giveaway with Small Batch Studio

***This giveaway is now closed***

I have another great giveaway for you this week! If you're a follower of my blog, chances are it's because you found me because you saw my Hospital Survival Kit on Pinterest or another social site. I could have never guessed how popular that little bag of goodies would be! I made the kit for a friend of mine who was due with her first baby last year. Since she had never had a baby before, my friend didn't know what kind of things she would want or need when she went to the hospital. I thought back to my last two births in the hospital and the things I wished I had brought with me, and that became my inspiration to make the kit.

Laura, a mother of 3 girls and owner of Small Batch Studio, had the same inspiration that led her to create the Push Pack, a pre-packed bag of wants and needs for laboring mamas. And the best part? The Push Pack is already assembled for you and can be customized in your choice of pink or blue. 


Laura says, There is nothing like preparing for the birth of your first-born...One thing I struggled with was what to bring to the hospital. There are lists out there, long lists. I know people who brought birthing balls, boom boxes, aromatherapy massage oils, as well as the clothes for themselves and their baby. Now, I am not saying that those things are unnecessary, but I don’t know any mom who brings the same stuff when they’re having #2.

The packing list for the subsequent births are much smaller and more practical. The only problem is now that you have a child or children, when do you have time to pack all of your essentials? Do you want to live out of a travel bag for two weeks? I came up with the idea of the Push Pack. I interviewed a bunch of moms asking them what things they were so glad to have or wished they’d had while they were in labor. The push pack includes the items that were mentioned most often. Call it wisdom and experience, peace of mind, and a gift of love all wrapped into one bag.


The Push Pack includes so many fun and useful goodies for new moms, and all bath and body products are either natural or organic. The pack includes:
  • EO® lavender scented shampoo, conditioner and bath gel
  • washcloth
  • make up remover
  • razor and shaving cream lotion
  • deodorant
  • comb and hair bands
  • lip balm
  • toothbrush and toothpaste
  • breast pads
  • maxi pads
  • disposable underwear
  • comfy socks (your choice of pink or blue)
  • playing cards
  • Motherlove Organic Nipple Cream®
  • notepad
  • thank you cards and pen
  • gum
  • Preggie Pop Drops®
  • Bellybar®
  • cup of oatmeal and spoon
What new mother wouldn't love to have all the essentials on hand when their new little one is born? The Push Pack would make a great shower gift for a friend (or keep one on hand for yourself!)

Laura is giving one of my lucky readers a chance to win their very own Push Pack! Each pack comes with the items above in your choice of blue or pink.

You can enter 3 different ways to win:
  1. Tell me which item in the Push Pack you love the most
  2. Like Small Batch Studio on Facebook
  3. Follow My Own Road and leave me a comment on this post letting me know

**The giveaway ends February 23rd at midnight CST. The winner of the Push Pack giveaway will be chosen using Random.org, and announced here on February 24th. Please make sure that your email address is linked to your profile when you comment, or include it in your comment.**

Saturday, February 18, 2012

I want candy

Valentine's Day is over....which means there are a lot of these on sale.


No matter how old I get, I still love these things. Each year I have to have several boxes of these chalky little hearts candies. They're nothing special really, but I still love them. They're kind of the fruit cake of the Valentine's Day season. You can find them in every store and people give them out because they're a staple of V-Day, but nobody really likes them. Except for me. Maybe it's because I can only get them once a year.


As the years have gone on, the messages have gotten more "high-tech" to reflect the times. Now you can find hearts that say "text me" and "dial my #." I'm going to die the day I get a conversation heart that says "facetime me."


I'm stocking up while I can, but in case your candy heart stash runs out, I found this awesome recipe to make your own at Capitol Hill Cooks so you can get your candy heart fix throughout the year :)

Now onto Cadbury Creme Eggs!

Friday, February 17, 2012

Giveaway Winner: The Sharp Crochet Hook

Happy Friday! If the promise of the weekend around the corner didn't make you happy enough, I'm excited to also announce the winner of the The Sharp Crochet Hook giveaway. I've had a lot of fun using this little tool to add decorative edges to my projects (and plans for quite a few more soon!)


After plugging all of the entries on Random.org, the lucky winner of the Sharp Crochet Hook is..............

#14, Susan D!


Congrats Susan! The winner has been sent an email. I'm sure you'll have just as much fun as I have playing with your new crochet hook.

Even if you didn't win, you can buy the Sharp Crochet Hook by itself for only $6.99, or you can purchase the combo pack that includes the hook and the Crochet Edging Handbook with 15 different crochet patters for $10.99. It's a great deal for such an awesome product. You can crochet decorative edging on all sorts of fabric (and even paper!) with this baby.

Thanks to all who entered, I appreciate each and every one of you! Make sure you check back next week - I have another really great giveaway for you then too!

Wednesday, February 15, 2012

First haircut

**Make sure you go HERE to enter my giveaway for The Sharp Crochet Hook! The contest ends tomorrow at midnight**

Well, we finally did it. We took Haley to get her hair cut for the first time! For almost 3 years, we've let her hair grow....and grow and grow. She has such beautiful long curls, but it had finally gotten to the point where her hair had a mind of its own and needed a trim.

I took her to Sweet and Sassy Salon, a salon and spa geared specifically to little girls. The facility itself is the ultimate in girly-ness - everything is pink and sparkly. They do haircuts and styles, spa services, and even parties! While we were, there a princess birthday party going on that Haley was absolutely captivated by (hence the zoned out look below.) The little girls were dressed in princess dresses and tiaras and were dancing around the place. I'm anticipating a future princess party for this girl.


Since she had never even had a trim before, Haley was skeptical when the stylist put her in a chair, draped a blanket around her so she couldn't move, and broke out a pair of scissors. Each time we visit the doctor's office, Haley screams and cries, so I was preparing for the worst.


This was the first cut when her little baby ringlets were chopped off :(

Thankfully, she did surprisingly well. Maybe it was the little television that each station is equipped with or the fact that there was glitter everywhere. Whatever the case, she was all smiles by the end. After cutting her hair, they also sprayed it with glitter (are you sensing a theme?) and then she had the option of having it sprayed with her choice of several scents. We chose strawberry :)


After that, she got her nails done too which is a special treat for her since we don't usually let her get them painted. She was very clear that she wanted her nails painted orange which is news to me. Usually everything has to be pink pink pink.


On top of her strawberry-scented glitter hair cut and orange nails, she also got a tattoo on her hand, her choice of sucker, AND 2 glittery flower tattoos on her cheek, all included in the haircut. Why don't they offer this to adults??


She was such a goober after we got done. She kept asking to go home so she could show daddy her pretty nails and hair. In fact, I couldn't get her to stand still for a good picture, so this is what you get.


I hope everyone is having a great week!

Monday, February 13, 2012

Review and Giveaway: The Sharp Crochet Hook

***This giveaway is now closed***


I love to crochet, the only problem is that I can only crochet things that are square or rectangular. When my daughter was born, I made a huge baby blanket made entirely of about 70 or so crocheted squares joined together. I was pretty impressed with myself because before then, all I had made was a ton of scarves. Needless to say, when Laura from The Sharp Crochet Hook contacted me about doing a review and giveaway of her product, I was thrilled to be able to make something other than a scarf.


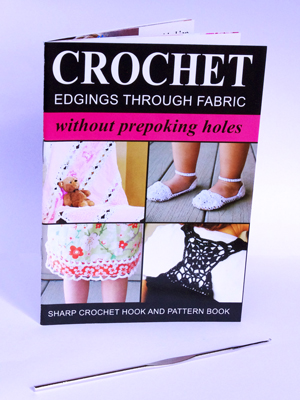
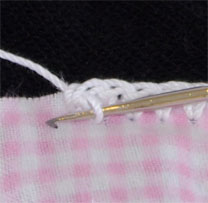
The Sharp Crochet Hook is a brilliant little crochet hook with a sharp point on the end that lets you easily add decorative crochet edging to projects without having to poke holes through the fabric before crocheting. You simply push the sharp end of the crochet hook through the fabric as you crochet. It's perfect for people like me who aren't experienced crocheters because you can easily add crocheted edging to projects to give them a beautiful handmade look.


Armed with my new Sharp Crochet Hook, I decided to make an appliqued shirt for my daughter. for Valentine's Day.

Supplies:
  • Shirt
  • 2 colors of felt squares
  • Sharp Crochet Hook
  • Yarn
  • Sewing machine and basic sewing materials 


First, cut out a heart from one of your squares of felt. Make sure it's about 1/2 inch smaller than you want your final heart to be since you'll be crocheting a border around it.


Next, use your Sharp Crochet Hook to crochet a border around your heart. I used The Quick and Easy Variation stitch in the Crochet Edging Handbook that came with my Sharp Crochet Hook. It was really easy to follow, and it contains 14 other stitches that I'll be trying on other projects soon.

Since the felt was so thick, I had to wiggle the fabric a little to get the crochet hook to poke through, but if I had chosen to use knit fabric instead I wouldn't have had any problems. The hook made edging SO easy since I didn't have to bother with poking holes through the fabric beforehand. I simply crocheted away while watching television and after a little while, I had a beautiful little crochet-edged heart!


Once you have your edging finished, pin your heart to your shirt and sew around the border to secure. Cut a second heart from another piece of felt and place on top of your crocheted heart. Pin and stitch to secure.


That's it! The the crocheted edges really made the shirt and gave it some personality. I can't wait to use my new Sharp Crochet Hook to add decorative edging to other projects!


So how would you like to win a Sharp Crochet Hook for yourself?

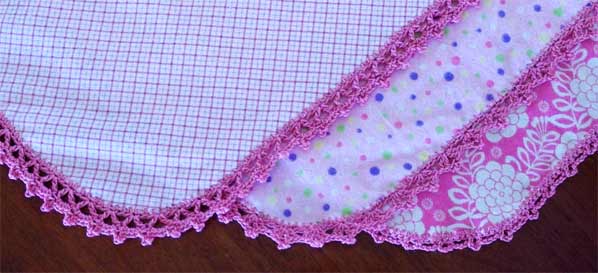
Laura is giving away one of her Sharp Crochet Hooks to one of my readers. The Sharp Crochet Hook is perfect for adding decorative edges and borders to receiving blankets, gloves, clothing, towels and even paper products!


You can enter 3 different ways to win your own Sharp Crochet Hook:

1. Like The Sharp Crochet Hook on Facebook and leave me a comment on this post letting me know
2. Tell me what you would make if you won
3. Follow My Own Road and leave me a comment on this post letting me know


**The giveaway ends at 11:59 pm CST on February 16th. The winner will be chosen via Random.org and announced here on February 17th. Please make sure you include your email address in your comment if it's not linked to your profile.**

Even if you don't win, the Sharp Crochet Hook would make a great gift -- or just buy one for yourself! You can buy the Sharp Crochet Hook by itself for only $6.99, or you can purchase the combo pack that includes the hook and the Crochet Edging Handbook with 15 different crochet patters for $10.99.


Good luck, and thanks for entering!

Friday, February 10, 2012

DIY Valentines Roundup

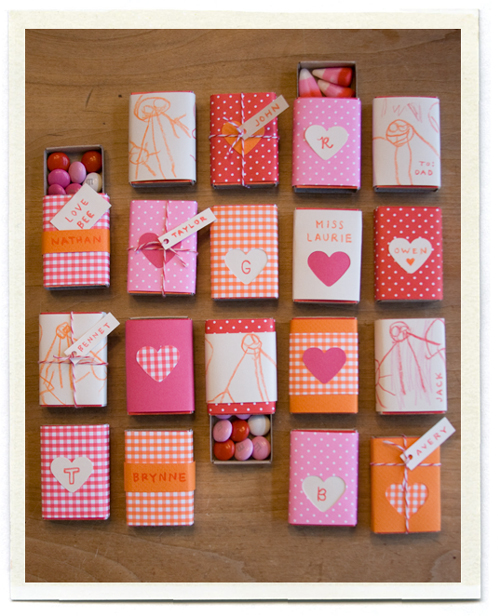
Need some fun ideas for last-minute valentines that you can make yourself? Here are a few great ideas I've spotted around the web!


Matchbox valentines @ Inchmark

 Valentine fish bowls @ Faboolous

Hopefully this roundup inspires you to try your hand at making your own unique valentines this year. Happy (Valentine) crafting!

Thursday, February 9, 2012

Warm winter strolls


The weather has been unusually warm in Tennessee lately. That means more walks outside, which is something I absolutely love. My husband is not so happy with the lack of snow. He came from Pittsburgh, the land of freezing cold. Every time we visit PA in the winter, I have to remember to bring heavy layers and big jackets. Here in Tennessee though, it's pretty perfect for casual strolls outdoors with my kiddos.

It's a good thing it's been so warm too, I've been needing to peel myself off the couch where I've been glued to The Hunger Games series. Seriously amazing books. If you haven't read them yet, go out and buy them. And also find a comfy couch and plan on being there for quite awhile because you won't be able to tear yourself away. It took me about a week and a half to finish all three books and now that I'm done, I'm a little sad. I always feel like something is missing when I finish a good book.

I did finally get around to doing a couple of projects though, including putting together a couple of giveaway posts that I'm really excited about :) Make sure you check back soon, I can't wait to show you what I've been up to!

How about you, have you been having more of a summer than a winter lately?

Monday, February 6, 2012

Perfect printable

How many people can say that they first met in the check out line of a Mongolian restaurant, or that they walked down the aisle to "Afternoon Delight" after they were married? If you can answer "yes" to both of those question, we have to talk because we NEED to be friends.

When I first met my future husband, he was this brilliant, handsome grad student, and I was a naive girl with no idea of what was best for me. After a brief conversation that first fateful afternoon at the Mongolian restaurant, we met again a week later at a friend's birthday party. Patrick, who I was about to find out was as much of an Anchorman fan as I was, randomly burst into a chorus of "Afternoon Delight" in the parking lot. I began to harmonize with him for several verses, and from then on, we knew that we were both equally as weird, so we had to be meant for each other.

Our relationship has always been unique. We were engaged 4 months after we started dating, I was pregnant a month and a half after we got married, and baby number two followed not long after. Nothing was ever forced with us, it just felt.....well, perfect.

Of course, no one is perfect. When we first got married, one of our first arguments involved me yelling at Patrick for leaving a dirty bowl in the sink for days without washing it because as EVERYONE knows, you're supposed to rinse the bowl out and put it in the dishwasher as soon as you're finished. Consequently, I also learned that it's weird and annoying when I leave multiple used paper towels laying around on the kitchen sink to use for later.

Apparently I'm less than perfect too.

Isn't that what love is all about anyway? Finding that one person who loves and accepts you despite all of your imperfections? I know it's true for me, and I wanted to free printable in recognition of all of our perfect imperfections.

Click HERE or click on the picture below to be taken to Google Docs where you can download this free printable in your choice of yellow, turquoise or gray, size 8x10.


And in case you were wondering, yes, I still leave paper towels laying around the kitchen.

Check out my sidebar to see where I link up each week!

Thursday, February 2, 2012

Banned

If you follow my Facebook page, you know that I banned all computer games and crafting last Saturday so that we could have some quality family time together. My husband said he felt like he was grounded, but for me, it was really nice to unplug and spend time together for the whole day.

And also, I liked not having to battle for attention with Pat's Star Wars The Old Republic game.  

(I took a bunch of pictures with my iPhone throughout the day, so they're a little grainy :)


We rented Kung Fu Panda 2 and watched it with the kids. Connor was obviously thrilled. He fell asleep almost immediately.


This little girl loved having us to herself though. We went through 2 bags of popcorn before she lost interest and Pat and I were left to finish the movie by ourselves.


For dinner, we broke out our fondue pot and made beer cheese fondue using this recipe. We both love the Melting Pot, but we don't love the price so making the fondue ourselves was a LOT cheaper - and a lot more fun! Our fondue pot was a wedding gift, and it hasn't seen a lot of action in the past 3 1/2 years, so it was good to get some use out of it for once.


I justify eating all that cheese with the fact that we're dipping veggies and fruit into it. And bread - you can't forget that.


In case you're wondering, the recipe was really good! It tasted almost exactly like the Melting Pot's version (and according to the source, it was actually shared on television by representatives of the Melting Pot so it's supposedly the real deal.) It was so good, in fact, that we made it again this past week.


While the Melting Pot generally uses a cheap beer in their cheese fondue, we found using the right kind of beer makes a world of difference. Newcastle is my personal favorite. And as an added bonus, you get to drink the rest of what you don't use :)


So that was our computer and craft-free weekend. Nothing huge and exciting, but enjoyable nonetheless. If I didn't think Pat would hide my fabric stash somewhere, I might consider doing another ban this weekend :)