Tabs

Wednesday, August 31, 2011

Potty Party!

 Finally, after a good 8 1/2 months of begging, pleading, bribery, and countless bags of Reeses Minis, Haley is  potty trained (and probably has a mouth full of cavities)! After months of hearing "no pee pee!" she finally gave into the fact that, as convenient as diapers may be, it's just not socially acceptable to wear them into your teenage years. Our grocery bill is rejoicing.

Thanks for all the great potty training advice you offered in May! After evaluating our options, we decided to stick with the "stickers and candy" method of potty training. We went to Sam's Club and stocked up on a ridiculously large box of Reeses Minis and got to work. She got one piece of candy for sitting on the potty, then another when she did the deed. And by the way, I think would be a much happier place if we each got candy every time we went to the potty. Just throwing that out there.

For awhile, nothing happened. If she did go, it was because we happened to catch her at the right time, which of course still resulted in much praise and excitement from Patrick and I. This was more or less confusing for her at first. All she knew was that we stole her pants, plopped her down on some strange toy with a hole in it, and then made lots of noise and clapping when she stood up. But hey, she got chocolate, and that was good enough for her.

When she began to catch on I decided to make things more fun for her, so I bought supplies to make her a potty chart, similar to the one on Prudent Baby.


Theirs is all cute and color coordinated, and they even have printable labels to go along with the chart. But I was feeling lazy and didn't feel like printing anything at the time. (Because there's obviously a lot of effort that goes into pressing the "print" button...) So I decided to make my own version:


I know, nailed it right? 
(totally being sarcastic...)

Believe me, I wasn't trying to make it nearly as cute as the ladies at Prudent Baby did. I used a piece of poster board and some crayons, then did my best to draw a chart...thing. I let Haley help me decorate it because it thought she might get more excited about something that she helped make. I had to suppress the desire to tell her not to color inside of the potty chart and just let her do her thing, but my OCD was definitely twitching. I also had to suppress the desire to tell her to put the stickers in the right place, even when she has only gone pee pee in the potty.

On a side side note - do any of you other moms out there catch yourself saying "pee pee" when you're referring to yourself? On a date night recently, I had to catch myself from telling my husband I was "going to go pee pee in the potty." Part of having a great marriage is all about good communication people ;)

Now, how to master #2?

Monday, August 29, 2011

The $0.50 Dress (a skirt to dress refashion)

Ok ok, I know there's only 2 days left until it's September, but I had to share one last dress that I made for Haley. Like I've mentioned before, it's summer until the end of October here in Tennessee, so while all of you are bundled up and enjoying your crisp autumn weather in a couple weeks, think of me as I'm holed up inside my house trying to ward off the 90 degree weather outside.

Anyway, back to summer-related things! I was walking through Gymboree a few weeks ago enjoying all the eye candy that I'm too cheap to buy - I mean, who wants to spend $25 on a pair of jeans for their kid when they're going to grow out of them next week? Hello sale rack! While I was browsing, one particular line caught my eye. Their Citrus Cooler collection was just so cute and summery!


I just love all the adorable citrus prints, but I wasn't about to pay $25 for a dress. Then it hit me. I had purchased a little girl's skirt with almost the exact same print last year at a garage sale for $0.50.


And that's how this skirt was refashioned into the easiest dress I've ever made. And it only cost me $0.50.

What's not to love about that?


Here's what you need to make one too!

Supplies:
  • 1 skirt with zipper (I used a child's size 10 skirt)
  • Ribbon (this is optional, but really makes the final dress look adorable)
  • Sewing machine and basic sewing supplies

Step 1: Size your dress.

Measure the diameter of your child's chest from armpit to armpit and add 1 inch. The diameter of my 2 1/2-year-old's chest is 21 1/2, so the total diameter is 22 1/2 inches. Divide this number in half, this will be the width the top of your front and back piece will each need to be. Since my total diameter is 22 1/2 inches, I want the width of the top of each of my front and back pieces to be 11 1/4 inches.

Turn your skirt inside out with the back of your skirt where the zipper is on top. Using the zipper as your center point, measure out the length that you calculated above and mark each endpoint on the waistband with disappearing ink marker. Draw lines from each of your points to the bottom of your skirt in an A-line fashion.


Next, pin the sides of your skirt together and sew on top of your lines from the top to the bottom, removing the pins as you go.


Cut off the excess material (make sure to save it, you'll be using it later) and finish your edges by zig-zagging or serging them.


Note on length: Since I used a child's skirt to make my dress, the length was perfect and needed no adjustment. If your skirt is too long, make sure you measure your child from the top where you want the dress to hit to their knees and add 1/2 inch, then cut the dress, hem and sew the bottom.

Step 2: Make your straps

You'll now be making straps from the scraps you cut off of the sides of your skirt. Here are the 2 scraps I had left.


To make your straps, you just need to make 2 tubes with your desired thickness and length. I didn't have much to work with, so my dress ended up having spaghetti straps that were a little over 1/2 inch wide and 7 inches long.

As you can see in the picture above, my scraps already were sewn down the middle because they came from the sides of my dress. I just folded each rectangle with the right sides together and sewed the other other side closed. Then, I just turned my tube inside out (use a safety pin) and sewed the ends closed. So easy!


Next, just pin the end of your strap to the inside of your dress and sew on top of the existing stitches so it blends right in. Repeat the process to sew the other end of your strap to the back of your dress.


You could just stop right here and be done, but I thought the dress looked like it was missing something so I added some ribbon.

Step 3: Embellish your dress.

To make a ribbon "belt" of sorts, just hand sew a couple of loops on either side of your dress a few inches from the top. You can double up the thread like I did for extra strength.


Then, just measure your child for the desired length of ribbon and add some extra so you can tie the bows.  Add some Fray Check to the ends so your ribbon doesn't unravel on you, then insert the ribbon through your loops.

And that's it! Simple, cheap, and a quick-sew. 
My favorite kind of project.


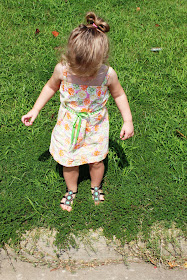
Now comes the hard part, getting your child to pose for the pictures.


If you're lucky, your daughter will stand still. Mine can't be bribed for all the candy in the world.


Enjoy your new dress!

Check out my sidebar to see where I link up each week!

Friday, August 26, 2011

End of summer

The weather has finally dipped below the 90's here, and I couldn't be happier. Neither could a certain little girl who has been patiently waiting to swim in her kiddie pool ALL STINKIN' SUMMER.

Call me crazy, but I have no desire to set foot outside when it feels like my skin is melting off. Maybe that's just me though. I'm a big fan of keeping my skin thanks.


We've brought out the kiddie pool a whopping 2 times this year. TWO. Isn't summer supposed to be all about being outside and enjoying the summer sun? Not when the temperature is in the nineties and low hundreds. And let me tell you, it's been that way for a couple months in a row. There's no point to summer if you can't even go outside and enjoy it. Even the vegetables in my garden lost their will to live in the sweltering Tennessee heat.


Even more reason for me to look forward to fall. I just love the cool, crisp air, the way the leaves change, and of course it doesn't hurt that October means Halloween candy. That's one of the perks to having small children; they're too young to know that "checking the Halloween candy for safety reasons" is synonymous with "Mom and Dad get all the chocolate."


But for now, we're enjoying the last days of summer as the heat slowly dies down and nights become more pleasant. There are lots of bare feet and cups of lemonade at the McCaffrey house. But I'll gladly trade my cup of lemonade for a piece of pumpkin pie. Or some Halloween candy. I'm not picky :)


Wednesday, August 24, 2011

Homemade pasta

Sorry I've been a little MIA lately. I've been going through some changes at work with a new position and all the challenges that learning a new job entails (mini freak out!) It's been good but stressful. I'm being stretched and learning a lot of new things, so when I come home I want nothing more than to flop down on the couch and eat a creamsicle. Which is exactly what I have been doing for the last few nights.

However, since it's probably not the healthiest thing to eat creamsicles every night for dinner, I did manage to drag myself off the couch long enough to try making my own pasta one night. And let me tell you, it's WAY easier than I thought it'd be!


I thought it would be some kind of long, complicated process that involved special tools and ingredients, but when I opened my favorite Better Homes and Gardens cookbook (which is my go-to cooking bible) to find an idea for dinner one night, I saw a recipe for homemade noodles. And with a whole 3 ingredients total, I felt like it would be pretty hard for me to completely screw this one up, so I gave it a go.


Do you like my homemade drying rack? That's totally a clothes hanger dangling above my sink. I may have taken one giant step into ghettoville with this method, but you can't argue with results. Sometimes it's the simplest method works the best. Who needs expensive equipment when you have a plastic hanger that works just as well, right?

I just combined all the ingredients, rolled out the dough, cut it into strips, then let it dry on my ghetto pasta rack overnight. In the morning, I woke to find some lovely dried pasta, minus a few jumpers that broke off and fell into the sink.


I prepared them simply by sauteing some crushed garlic and tomatoes in olive oil, then tossing it with basil, oregano, and parmesan cheese. So tasty! My only problem was that I didn't cut the noodles thin enough so they didn't cook as evenly as I liked.

Oh well, that's what you get when you use a rolling pin and clothes hanger instead of a pasta machine, right?


I also made a second batch of noodles that I chose not to dry, and instead modified THIS recipe for chicken noodle soup from Allrecipes.com and substituted my homemade noodles in place of the egg noodles. It was nothing short of amazing. One of those meals perfect for a cold winter night or a rainy day, you know?

Too bad it's in the 90's here still...which didn't stop me from making a giant pot of soup anyway :) I see many more batches of homemade noodles in my future!

Friday, August 19, 2011

Sail Away Dress Sew-Along: Day 5


Today is the last day of the Sail Away Dress Sew-Along! I hope you've had fun sewing with me :) After yesterday's post, your dress should be finished. Today's post is all about making the sash to go with it.

For the sash, you need some fabric from one of your button down shirts - I used one of the sleeves - and a couple lengths of knit fabric, which I cut from an old t-shirt.


Step 1: Make your main piece.

First, measure your child around their waist where the sash will sit (no need to add any extra to the measurement.) Cut a strip of fabric this length by 4 inches wide (and hopefully your fabric won't be as wrinkled as mine because you'll iron yours like I should have :)


Fold your rectangle in half with the right sides together and press.


Sew down the long side to make a tube.


Next, press your seam to the middle. Do this by moving the long side you just sewed so that it's in the center of your tube, then iron down. Turn your tube right side out.


Next, tuck your open ends inside of your tube and press.


Step 2: Attach your ties.

 Cut 2 pieces of knit fabric each approximately 20 inches long and 1 inch wide. I cut my pieces from an old t-shirt. There's no need to hem any of the ends because knits don't fray - love that!


Tuck one end inside of your tube and topstitch 1/4 inch from the edge...


And that's it!


A great little dress for the last warm days of summer. You could even pair it with a long sleeve shirt and some leggings for when the weather gets cooler.


But let's not think about cold weather yet.


Let's savor the warm weather while we have it. Which, for Tennessee, is until about October so I guess my little cutie will be getting a lot of wear out of this dress!


Thanks for sewing along with me! 

If you make a Sail Away Dress I'd love to see it! Please email me at myownroad(at)yahoo(dot)com!

Thursday, August 18, 2011

Sail Away Dress Sew-Along: Day 4


The end is near! And I don't mean in a creepy "end of the world" sort of way. More of a "your dress is almost finished!" kind of a way. After today, all we have left to do is to make the sash, which is totally optional (but oh so cute :)

Now on to strap making!


Step 1: Create your straps.

To make your straps, first measure your child over the shoulder from the point on her chest where you want the top of the dress to hit to her shoulder blade where you want the back of the dress to hit and add 2 inches. Cut out 4 rectangles from your shirt this length and 1 1/2 inches wide.

Place 2 pieces on top of each other right sides together, and fold in half with the folded part at the top, pinched between your thumb and forefinger. Cut at an angle starting from the bottom and meeting the end of the fold. Unfold your pieces, and you should have 2 angled sides, almost like an arrow.


Pin and sew around the perimeter of your straps, leaving the one short end that isn't angled open.


Clip the pointed parts of your strap close to your thread (but make sure you don't cut your thread), and use a pointed object to turn your straps inside out.

Tuck the open end of each strap inside and press closed. Topstitch around the entire perimeter of each strap about 1/4 inch from the edge.

Step 2: Sew button holes on your straps.

Sew button holes 1/4 inch from the pointed ends of each strap. Make sure your button holes are big enough to accommodate your buttons.


Step 3: Attach your straps.

Flip your dress inside out. Line up your straps with the inside edge of your dress. Pin your strap so that the bottom overlaps the bottom of the bias tape slightly. Sew on top of the line you previously sewed when you attached your bias tape.


If you want to make sure the straps are really secure, you can sew a second line above that one like I did. This is what the strap should look like when looking at your dress right side out.


Step 4: Add buttons to the front.

Now, just hand sew a couple of buttons to the front of your dress on each end, and that will do it for the dress itself!


Aside from the sash, your dress is done!
__________________________________________________

Tomorrow, I'll show you how to make the sash to go with your dress.

Thanks for sticking with me, see you tomorrow for the last day of the Sail Away Dress Sew-Along!